Category: Uncategorized

  • Catch Black Pod Early. Protect Your Cocoa. Save Your Farm.

    Catch Black Pod Early. Protect Your Cocoa. Save Your Farm.

    Black pod disease is one of the biggest threats to cocoa production across West Africa. Many farmers have seen healthy pods turn black almost overnight, losing a large part of their harvest. The truth is, black pod is dangerous, but it can be managed if spotted early.

    In this blog, we’ll show you how to identify the first signs of black pod, understand how it spreads, and share simple steps you can take to protect your farm.

    What is Black Pod Disease?

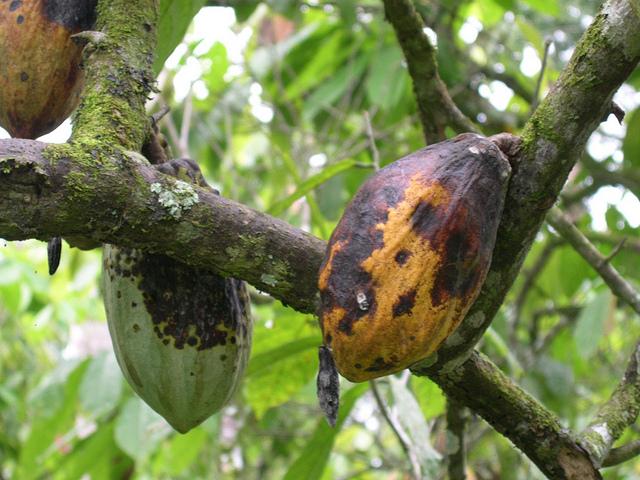
    Black pod disease is caused by fungi from the Phytophthora group. These fungi thrive in warm, wet, and humid conditions, exactly the kind of weather cocoa grows best in. Once the fungus infects a pod, it rots quickly and becomes useless for processing.

    If not controlled, black pod can destroy 30% to 90% of your harvest in one season.

    Why Early Detection is Important

    Every farmer knows prevention is cheaper than cure. The earlier you notice black pod, the easier and less costly it is to control. Waiting too long means:

    1. More pods get infected.
    2. Sprays become less effective.
    3. You risk losing a big share of your income.

    Early Signs of Black Pod to Look Out For

    When walking through your cocoa farm, check your pods carefully. Here are the main things to watch for:

    1. Brown or dark spots on green pods.

    2. Water-soaked or soft areas as if the pod has been bruised.

    3. Rapid blackening (the brown patch spreads until the pod turns fully black).

    4. Rotting before maturity (i.e., pods spoil while still young).

    5. White fungal growth (in very humid or rainy conditions, you may see a white layer of fungus on the infected pod).

    If you notice any of these signs, act immediately.

    What to Do if You Spot Black Pod

    Here are simple steps to control black pod early:

    * Remove and destroy infected pods: cut off infected pods and bury them away from the farm.

    * Prune and weed regularly: keep the farm clean and airy to reduce humidity.

    * Spray fungicides correctly: use recommended fungicides at the right intervals, especially during the rainy season. For cocoa, we recommend Mackeknie Gold or Mackeknie Extra for controlling black pod infection in cocoa.

    * Harvest frequently: don’t leave ripe pods hanging too long.

    * Improve drainage: avoid stagnant water around your farm.

    Long-Term Prevention

    * Plant resistant cocoa varieties where possible.

    * Train your workers to identify early symptoms.

    * Stick to a seasonal fungicide program, not just emergency spraying.

    * Practice farm hygiene throughout the year.

    Wrapping up,

    Black pod is a tough enemy, but it’s not unbeatable. By checking your pods regularly, acting fast, and maintaining good farm practices, you can protect your cocoa and secure your harvest.

    Remember: a few minutes of inspection today can save you months of hard work tomorrow.

  • 5 Land clearing myths that could be costing you money (Here is the Truth)

    5 Land clearing myths that could be costing you money (Here is the Truth)

    When people hear “land clearing,” they usually picture bulldozers ripping through forests or farmers setting the entire fields on fire. For some, it’s the villain of environmental destruction. For others, it’s simply a quick, no-questions-asked step before farming or construction.

    The truth is more complex. Land clearing isn’t inherently bad, it’s the methods and management that make all the difference. Misconceptions, especially about herbicides and other clearing practices, often cloud the conversation and lead to harmful choices on the ground.

    Let’s break down some of the most common myths and uncover what really works.

    Myth 1: Land clearing is always destructive

    The word “clearing” tends to paint a mental image of bulldozers flattening everything in sight. But not all land clearing is reckless. Methods such as selective clearing (removing only specific trees or bushes), mulching, and the use of targeted herbicides can prepare land while protecting soil structure, reducing erosion, and preserving valuable vegetation. Sustainable land clearing is not about wiping land bare; it’s about making land usable without stripping it of life.

    Myth 2: Burning is the cheapest and best way to clear land

    Across many farming communities, bush burning remains the go-to method of clearing. It’s fast, requires minimal equipment, and appears to be cost-effective. But the hidden costs are heavy: nutrient loss in the soil, release of carbon emissions, and destruction of beneficial organisms. While it may feel cheap in the moment, burning often reduces land productivity in the long run. Alternatives, such as controlled use of herbicides, are safer for both the soil and the surrounding environment, which brings us to the next point.

    Myth 3: Herbicides ruin the land

    Herbicides often have a bad reputation, typically due to stories of misuse, such as spraying excessively, ignoring recommended guidelines, or using unapproved products. The truth is, when used correctly, land-clearing herbicides are a controlled and effective tool. They suppress unwanted vegetation without destroying soil structure, unlike burning or repeated tillage.

    At Saro Agrosciences, we are committed to ensuring that our farmers have access to only the best and safest products. Hence, the reason we constantly reassess and improve our active ingredients. Currently, with some of our land-clearing herbicides, specifically, Slasher, Slasher Super, and Slasher Gold, we have replaced the previous active ingredient (Paraquat) with a safer and more environmentally friendly option (Glufosinate), to keep you and your crops safe while still saving labour, improving efficiency, and making land preparation more sustainable.

    Myth 4: Manual clearing is always the safer option

    Manual methods; using cutlasses, hoes, or slashers, are often said to be the “natural” way to clear land. But they can be labour-intensive, slow, and impractical for large areas. Over-clearing manually can also expose soil to erosion if not done carefully. A balanced approach that combines manual clearing for sensitive areas and herbicides or mechanical methods for broader spaces is often more efficient and sustainable.

    Myth 5: Once the land is cleared, the job is done

    Clearing is only the first step. Without follow-up measures, newly cleared land can degrade quickly. Effective land management requires soil conservation practices, cover cropping, and careful monitoring to prevent invasive weeds from reestablishing themselves. Sustainable land use means thinking beyond the initial clearing and planning for long-term productivity.

    Wrapping up,

    Land clearing is not inherently bad, it’s the practices around it that determine whether it’s destructive or sustainable. Herbicides, when properly applied, can play a valuable role in modern land preparation. By moving past myths and embracing responsible practices, farmers, communities, and policymakers can ensure that land clearing supports growth without costing the environment.

  • Top 5 Legumes With High Market Demand in Nigeria Right Now

    Top 5 Legumes With High Market Demand in Nigeria Right Now

    Legumes are profitable. Whether you’re a smallholder farmer looking to boost income, a trader seeking fast-moving commodities, or an agribusiness investor searching for scalable opportunities, legumes offer a smart path forward.

    Why? Because they’re versatile. Nigerians eat them, export them, use them for animal feed, and process them into everything from cooking oil to baby food. Legumes also enrich the soil, making them an ideal addition to crop rotation systems, especially in a country where fertiliser costs keep rising.

    But not all legumes are equal when it comes to market value. Some are in steady demand year-round, others spike seasonally, and a few are quietly becoming Nigeria’s next agri-cash crop. So, which ones are truly worth your time, land, and investment?

    Here are the top 5 legumes currently in high demand across Nigerian markets:

    1. Soybeans

    Why it’s in demand:
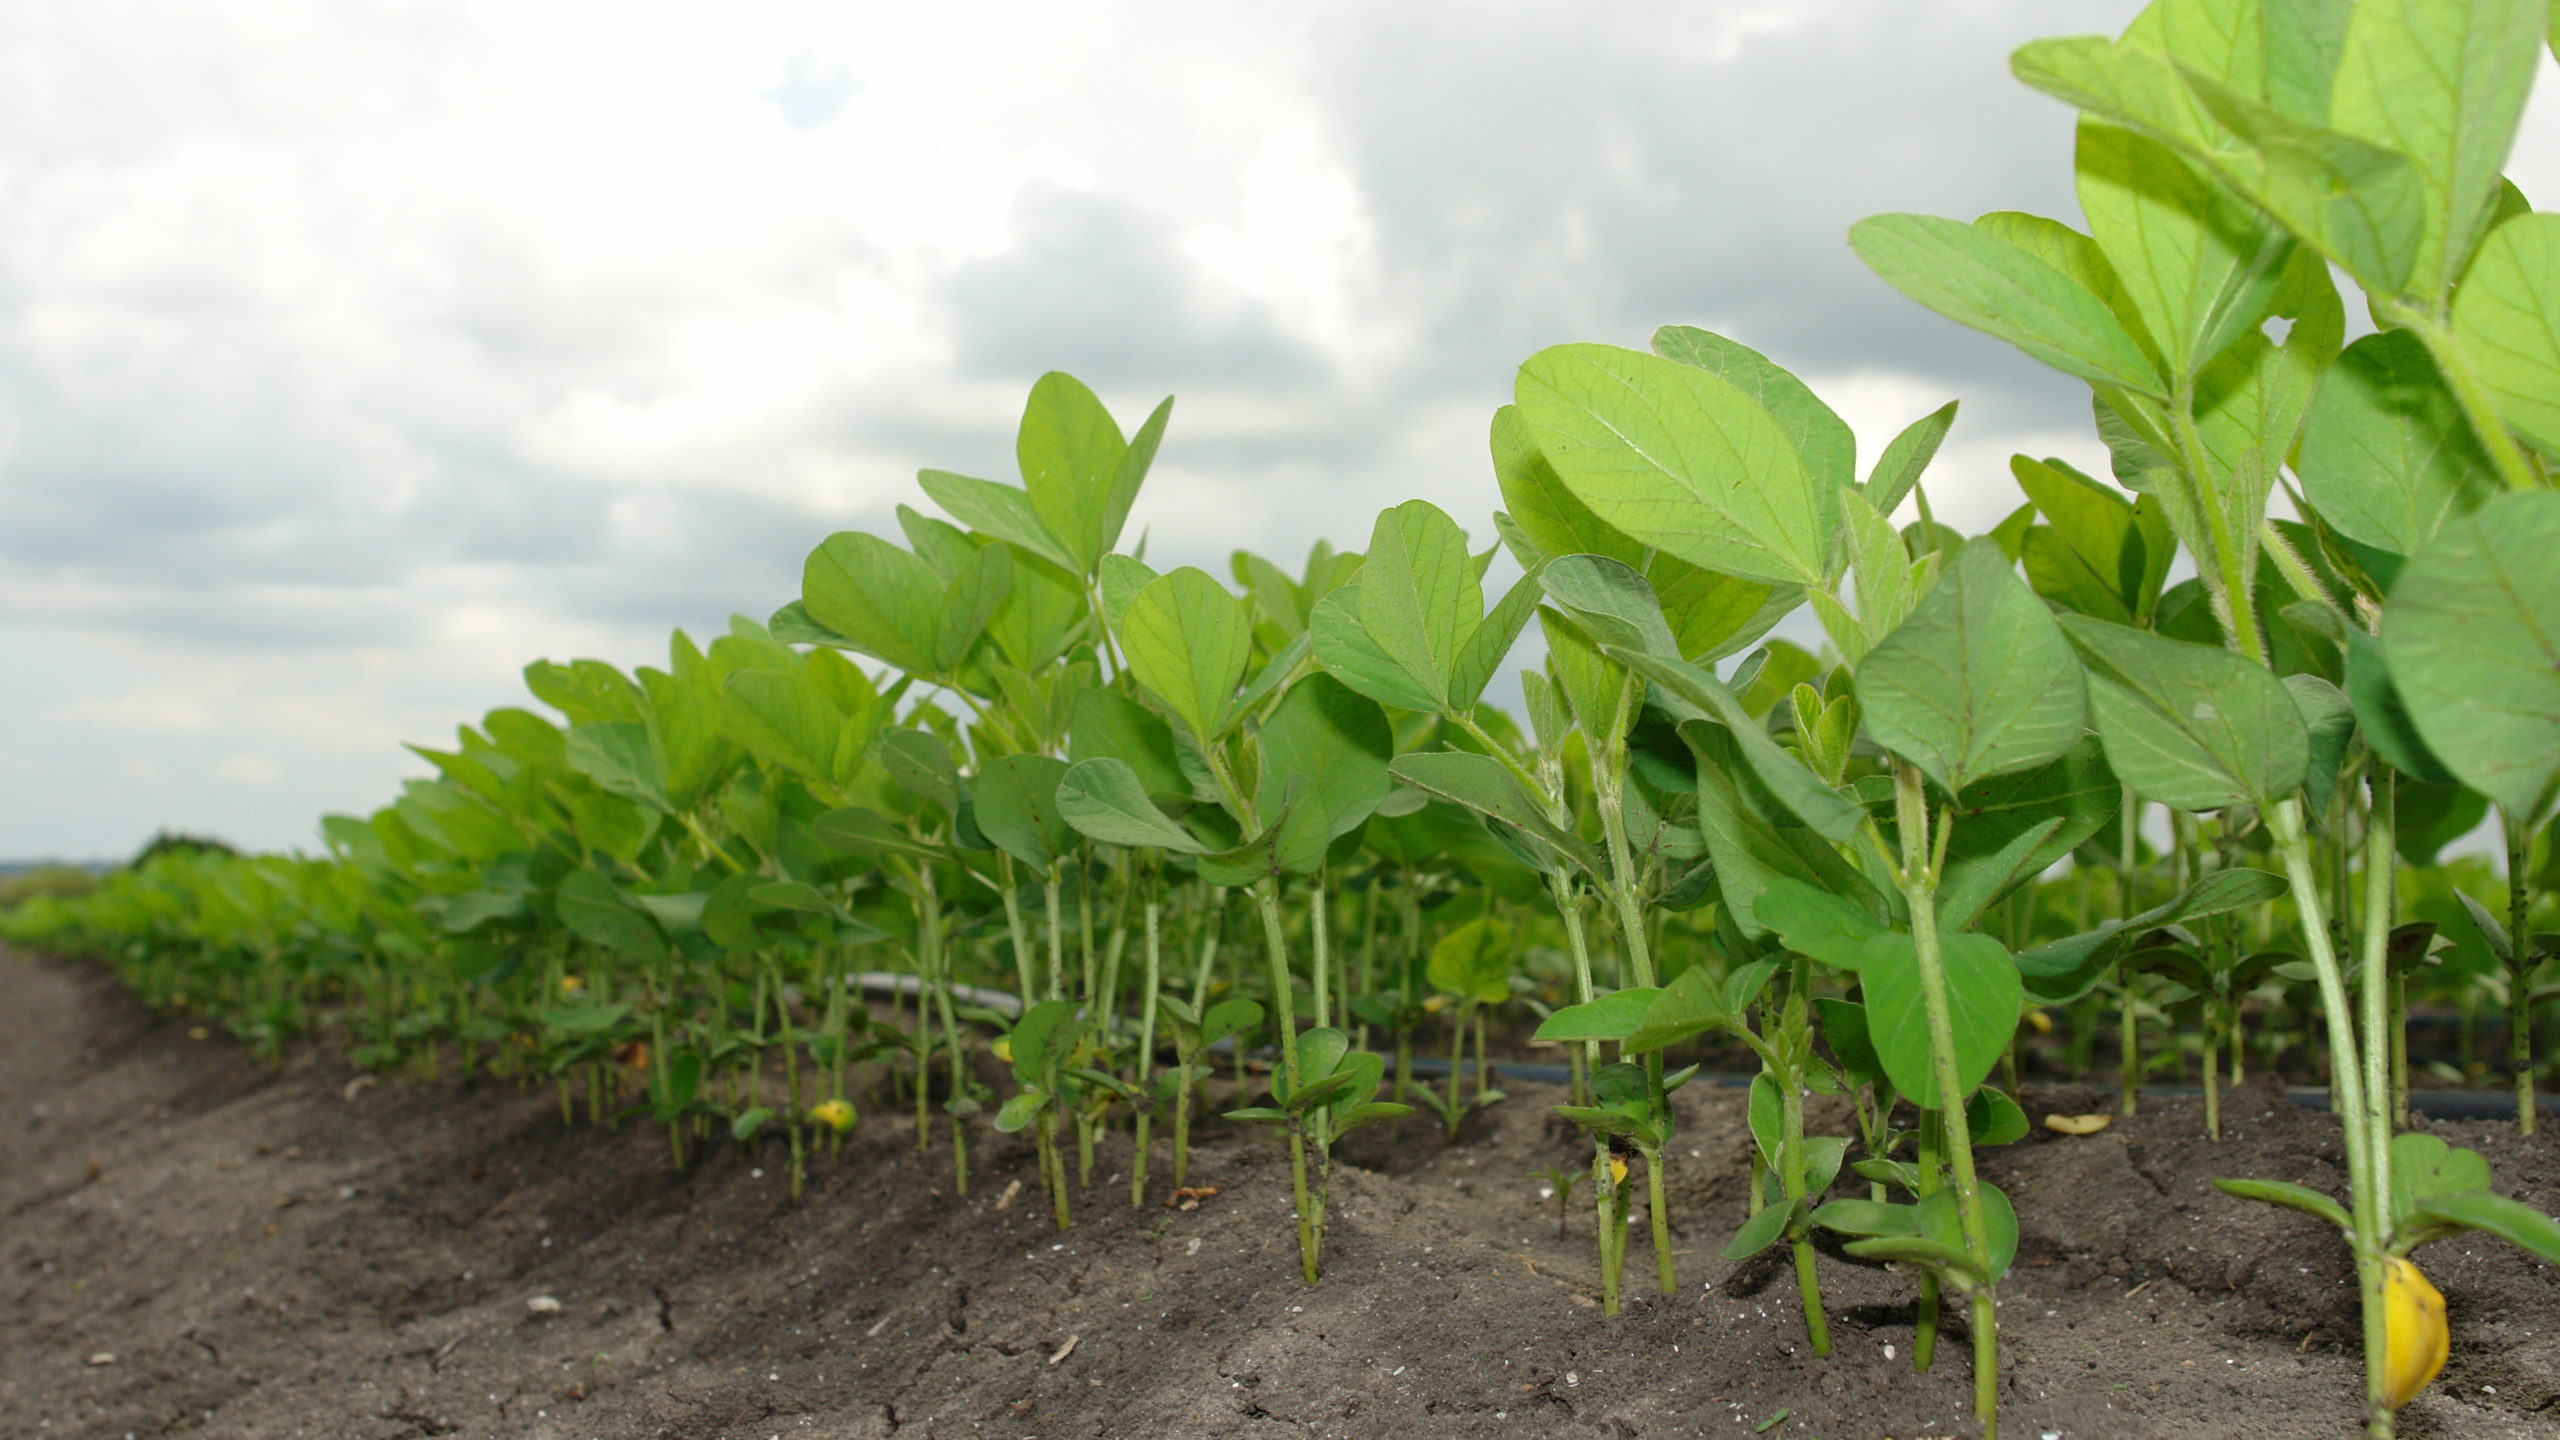
    Nigeria’s growing food processing industry can’t get enough soybeans. It’s a key ingredient in baby food, cooking oil, livestock feed, and even plant-based milk.

    Soybeans grow well in the North and parts of the Middle Belt. If you can time your planting well with the rains and keep weeds under control, the returns are solid, especially when sold in bulk.

    Who’s buying:

    • Feed millers
    • Oil producers
    • Exporters (especially to Asia and North Africa)

    2. Cowpea (White Beans)

    Why it’s in demand:
    Cowpea (Beans) is a Nigerian kitchen essential. From Akara to moi-moi and rice-and-beans, they’re everywhere. White beans are especially preferred in most homes and restaurants. Cowpea prices usually shoot up during the dry season. Consider storing and selling later for better profits.

    Who’s buying:

    • Local markets (steady demand)
    • Food vendors and bulk caterers
    • Exporters (especially to neighbouring West African countries)

    3. Groundnut (Peanut)

    Why it’s in demand:
    Besides being a household snack, groundnut is used for oil production, animal feed, and confectionery. It’s a multi-use crop with strong value chain opportunities. For instance, groundnut cakes (kuli-kuli) are in high demand in the north and some southwestern states, and processing them can add extra income.

    Who’s buying:

    • Oil mills
    • Snack manufacturers
    • Exporters (especially for raw shelled nuts)

    4. Bambara Nut (Okpa)

    Why it’s in demand:
    Bambara thrives in poor soils and is drought-tolerant, making it a low-risk, high-reward crop in the right zones. Though less mainstream compared to other legumes on this list, Bambara nut is gaining traction, especially in the South East and parts of the South-South, for its use in making Okpa, a popular delicacy.

    Who’s buying:

    • Local processors and food sellers
    • Nutritionists and food companies (for its high protein profile)
    • Exporters targeting niche African food markets

    5. Pigeon Pea (Fio-fio)

    Why it’s in demand:
    Popular in parts of the East and Middle Belt, pigeon pea (fio-fio) is gradually entering urban food markets due to rising interest in local delicacies and healthier eating. Demand spikes during cultural festivals and off-season periods. With some storage, you can cash in big.

    Who’s buying:

    • Local markets in the East
    • Urban grocers and health-conscious consumers
    • Exporters (especially to India and Caribbean markets)

    Wrapping up,

    As food inflation rises and Nigerians become more intentional about their food choices and cultivation, legumes will continue to play a key role. They are nutritious, profitable, and sustainable, a rare trio in today’s farming world.

    So whether you’re planting, processing, trading, or exporting, these 5 legumes should be on your radar. Start small, study your market, and grow smart. The demand is already there, what’s left is for you to plug in.

  • What Next After Harvesting Maize? (5 Key Steps to Take)

    What Next After Harvesting Maize? (5 Key Steps to Take)

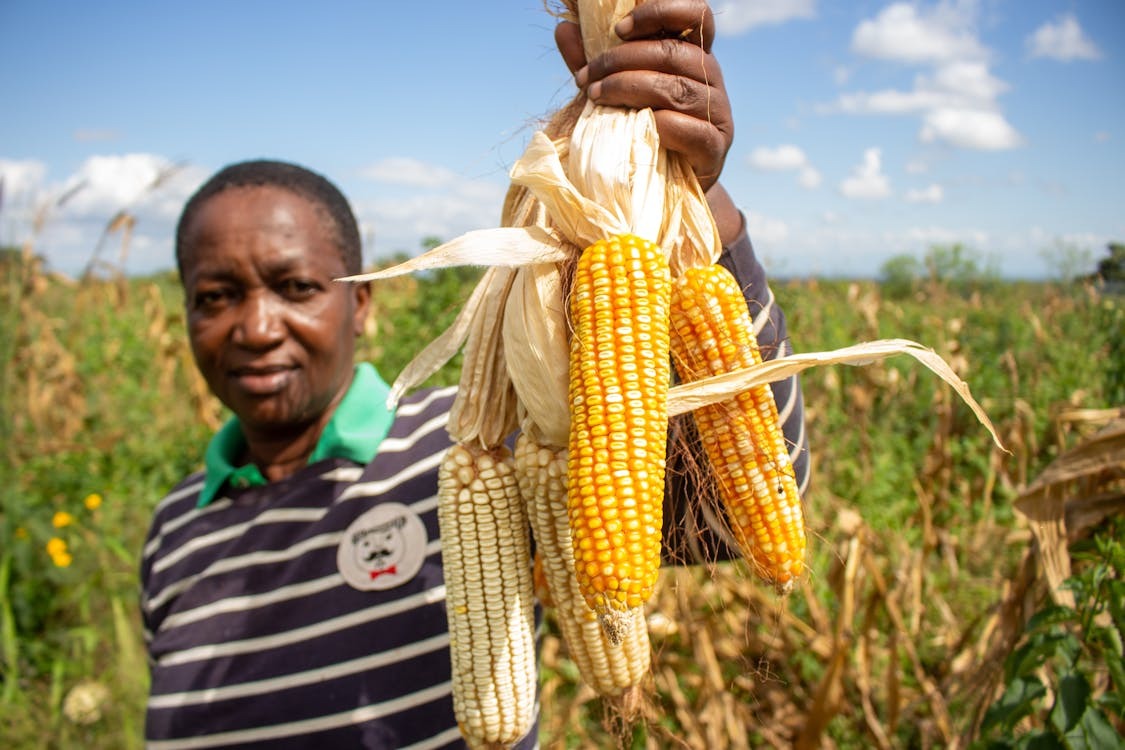
    For many farmers across the southwestern states, especially those who planted maize earlier in the year, harvest season is already in full swing. And honestly, there’s nothing like that feeling—watching those full cobs come off the stalk, knowing the months of hard work, sweat, and prayer have paid off.

    Now, while some people grow maize mainly for family consumption (subsistence farming), many others do so with a clear goal: to earn a profit (commercial farming). Whether to fulfill personal or family responsibilities, restock the farm, or just turn in a decent profit, farming is business. And if that’s your mindset, then this blog is especially for you.

    Let’s walk through 5 key steps you should take right after harvesting maize to protect your yield, maximize profits, and prepare for the next cycle.

    1. Proper Drying – Don’t Let Moisture Ruin Your Effort

    Freshly harvested maize contains a lot of moisture—usually between 18% and 30%. If not dried properly, it can develop mold or aflatoxins (toxic compounds that make the maize unsafe for consumption and unfit for market). That’s money lost and health risks introduced.

    What to do:

    • Sun-dry your maize on clean, dry surfaces (like tarpaulin, mats, or concrete floors). Avoid drying directly on bare ground—it can contaminate the grains.
    • Spread it thinly and turn regularly for even drying.
    • Aim for a moisture content of about 13% for safe storage. You can use a moisture meter (handheld ones are quite affordable now) or perform a bite test if you’re very experienced with the process.
    • If you’re drying on a large scale or during rainy season, consider mechanical dryers or drying services where available.

    2. Keep It Neat, Keep It Market-Ready

    Once the maize is dry, the next step is to remove the kernels from the cob, a process called shelling. For small farms, manual shelling (using hands or hand-held shellers) might work. However, larger farms should opt for mechanical shellers to save time and reduce grain breakage.

    After shelling, ensure that you clean the maize to remove dust, chaff, stones, or broken kernels. A simple sieve or blower can go a long way.

    Clean, well-shelled maize not only looks better, but it also fetches better prices and reduces the risk of spoilage during storage.

    3. Store Properly to Protect Your Hard-Earned Harvest

    Don’t just dump your maize into sacks and forget about it. Post-harvest pests like weevils and rodents can wreak havoc if you’re not careful.

    Best practices:

    • Use clean, dry, and airtight bags (preferably polypropylene or hermetic storage bags like PICS bags).
    • Store in a cool, dry place, off the ground and away from direct sunlight or rain.
    • Consider treating maize with natural preservatives like neem leaves or food-safe pesticides if you’re storing it for a long time.
    • For bulk storage, invest in metal silos or grain banks.

    Pro tip: Always label your storage bags with the harvest date, moisture level, and treatment (if any). This helps you monitor and rotate stock.

    4. Timing is everything!

    Now that your maize is safe, you need to decide: sell immediately, store for better prices later, or add value?

    If you chose option A (sell immediately):

    This is common during harvest season but often yields lower prices due to market glut.

    • If you must sell, compare prices across buyers—local markets, aggregators, processors, and even online platforms.

    For the second option B (storing to sell later):

    Prices may go up after the harvest season. If you have secure storage, waiting a few months may significantly increase your income.

    For option C (processing/value addition), here are a few ideas if you want to earn more and maybe explore agribusiness:

    • Process maize into flour (pap/ogi), animal feed, or grits.
    • Package and brand your products for local or urban markets.
    • Even simple cleaning, grading, and bagging can add value.

    5. Start Planning for Next Season Now

    Many farmers wait until the rains are almost here before thinking about land preparation. That’s a big mistake. What you do between harvest and the next planting season often determines how successful your next harvest will be.

    Key post-harvest field activities:

    • Clear the residue: Dry stalks and roots should be removed or ploughed back if you’re practicing conservation farming.
    • Soil testing: Find out what your soil needs; don’t just assume. Is it nitrogen-deficient? Is the pH too low?
    • Apply compost or manure: Improve soil fertility ahead of the next season.
    • Fix drainage or irrigation channels: If you noticed waterlogging or poor water supply last time, fix it now.
    • Plan crop rotation: Avoid planting maize back-to-back on the same field. Rotate with legumes (like soybeans or cowpeas) to fix nitrogen and break pest cycles.

    Wrapping up

    Harvesting maize is just the halfway mark. If you want to get the best returns—whether as a subsistence farmer or agribusiness owner—you need to handle post-harvest steps with the same seriousness as planting.

    Dry well. Store smart. Sell right. Plan ahead.

    You’ve already done the hard part. Now it’s time to protect your profit and set yourself up for an even better next season.

  • Rainfed or Irrigated, What is the best way to grow your rice?

    Rainfed or Irrigated, What is the best way to grow your rice?

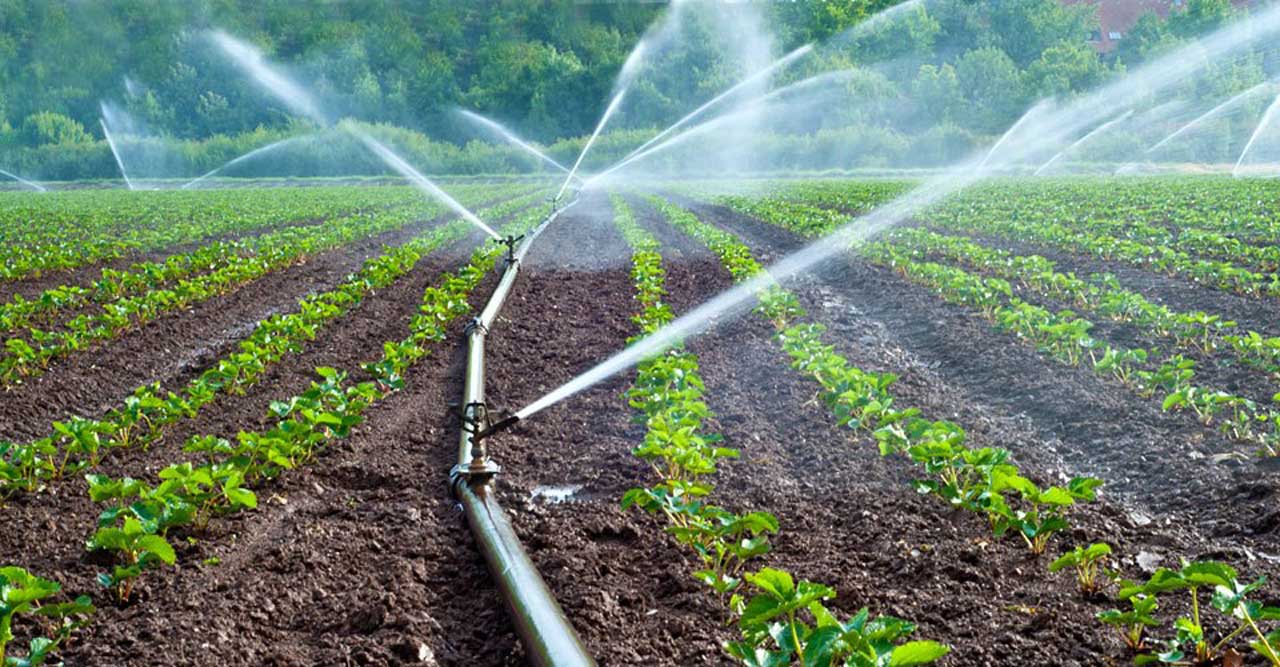
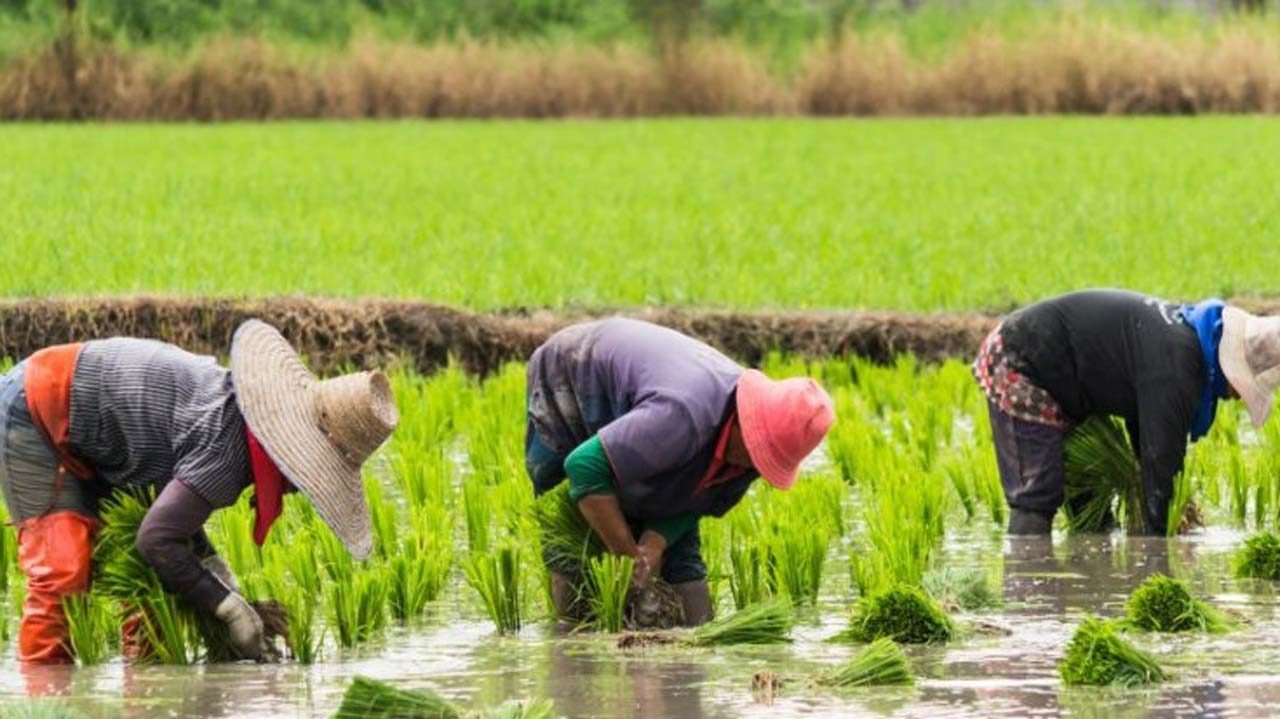
    Every rice farmer understands one key fact, water is essential. Rice doesn’t just like water; it needs a lot of it. From the moment it’s planted until harvest, rice depends on steady moisture to grow well. In the past, farmers relied on rainfall to meet this need. But today, many have come to accept that the rains are no longer as reliable as they once were.

    With shifting weather patterns, lower humidity, unpredictable rainfall, and longer dry seasons, depending only on rainfall has become a big gamble. That’s where irrigation comes in, the controlled supply of water through man-made systems. Whether it’s canals, pumps, boreholes, or sprinklers, irrigation gives farmers better control over water, even during the hottest, driest periods.

    In this blog, we’ll explore the major differences between rainfed and irrigated rice farming, looking at water needs, infrastructure, expected yields, labour demands, and how each method can affect your income. Whether you’re already in the middle of your farming season or just getting started, this guide will help you make smarter, more sustainable choices for your farm.

    Let’s start with the most obvious factor to consider.

    1. Where does your water come from?

    Your rice can only grow as well as your water source allows. If your farm relies solely on rainfall, then you have little control over when and how much water your crop gets. That can be risky, especially with climate change making rainy seasons shorter or less predictable.

    If your area has regular rain, rainfed farming might still work, but if you’ve noticed drier spells or delayed rains, you may need to start exploring backup options. Irrigation gives you that control: with canals, boreholes, or pumps, you can supply water when nature doesn’t.

    2. Yield potential can be affected by irrigation

    Irrigated rice fields usually produce more rice, more often. With water always available, your plants stay healthy, and you can even farm two or three times a year. Rainfed farms can still do well, but they depend on the weather. One bad season, and your yield may drop.

    Our recommendation is to have a mix of both systems, with the artificial setups supplementing/covering for periods where weather patterns may fluctuate between great and not-so-great.

    3. Think beyond this season

    Rainfed farming is cheaper upfront, but puts your whole harvest at the mercy of the weather. Late rains? You’re planting late. A mid-season drought? Your crop may not recover. Irrigation gives you the power to decide when to plant, how often to water, and how long to grow. Yes, it costs more, but it reduces the chances of losing your crop completely through dry-season farming, vegetable rotation, or fish-rice integration, options that can potentially bring in more money and reduce risk.

    4. Choose what fits based on your farm

    We cannot emphasize this enough: Your farm is unique; what works for someone else’s land or region may not work for you. So, your preferred approach to managing it should be based off its requirement rather than simply following the crowd.

    Maybe your soil holds water well and your area gets consistent rain; then rainfed might be enough. But if your fields dry out quickly, or your rains are less reliable, then it’s time to ask: how long can I keep farming this way? Just make sure to pay attention to your rainfall pattern, soil type, finances, and goals. Choosing the right method isn’t about following the crowd; it’s about knowing your land and planning wisely.

    Because at the end of the day…
    Both rainfed and irrigated rice systems are valid. They each have their strengths and challenges, and what works best depends on your farm’s location, your budget, your risk tolerance, and even the type of rice you’re growing. One offers simplicity and lower input costs; the other promises consistency and higher yields, but at a price. Whether you rely on the sky or build your own system underground, how you water your rice fields plays a big role in how much you harvest and how much peace of mind you have while doing it.

    Where possible, we recommend combining both methods—i.e., using rainfall when it’s available and supplementing with irrigation when it’s not, for more resilient, productive farming.

  • From Seed to Planting: Getting Your Rice Farm Started the Right Way

    From Seed to Planting: Getting Your Rice Farm Started the Right Way

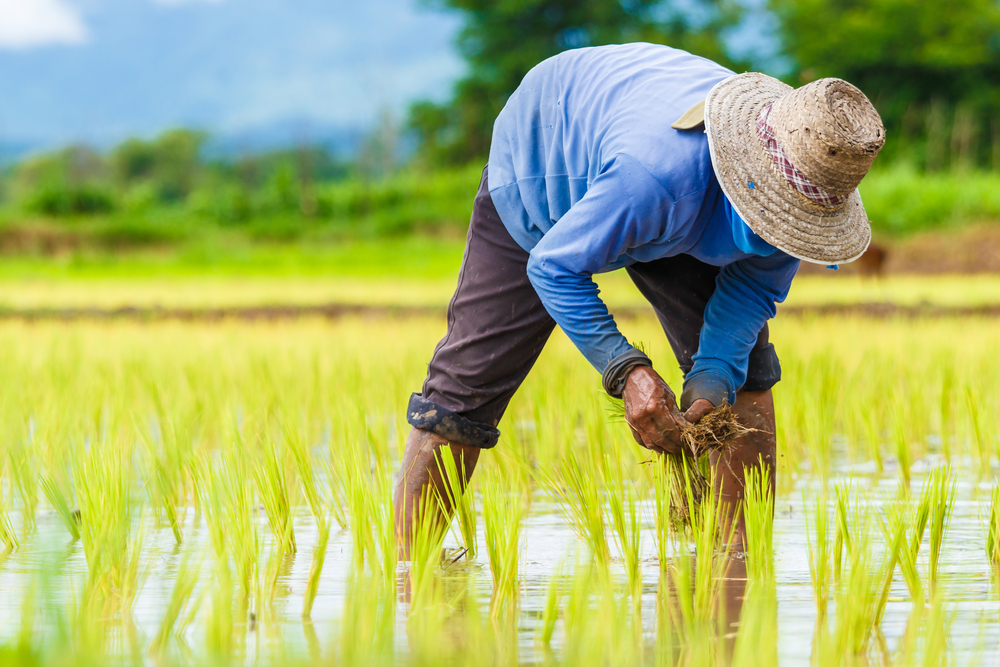
    Rice is one of the most widely consumed staples in Nigeria, and local production still struggles to meet rising demand. For anyone looking to grow a profitable and high-demand crop, rice is a smart choice. And if you’re waiting for the perfect time to start, this is it. Rice thrives in waterlogged conditions, especially in rainfed lowland areas, and the natural rainfall this season provides exactly what the crop needs to grow strong and yield well. If you haven’t already gotten started, now is the time to take that first step.

    Whether you’re new to rice farming or not, this blog will walk you through the key things you need to know: choosing the right seed variety, preparing your land, managing weeds, protecting your crop, and harvesting for profit. Let’s get into it.

    1. Understand your land before you plant

    Every successful rice farm starts with knowing your soil and your environment. Rice thrives best in warm, humid climates with an abundant water supply, which makes areas in the lowland tropics especially suitable. Your first task should be a soil test to determine fertility, pH, and any nutrient deficiencies. Rice does best in slightly acidic to neutral soil, ideally between 5.5 and 7 pH. This allows you to know exactly what your soil needs before planting begins—whether it’s lime to raise pH or organic compost to boost fertility.

    If your farm is located in a rainfed or irrigated lowland area, your rice crop will likely flourish, provided you manage the water well.

    2. Choose the right rice variety for your location and goals

    Picking the right seed variety makes all the difference. Your choice should reflect both your ecological zone and the kind of yield you want to achieve.

    FARO 67 is a standout option for many farmers. It’s a high-yielding variety, capable of producing up to 6.7 tons per hectare. This variety features long to medium slender grains and takes about 120 to 125 days to mature. It’s moderately tolerant to iron toxicity and can survive temporary submergence. FARO 67 is especially recommended for Derived, Guinea, Sudan, and Sahel savanna ecologies. Its seed rate is around 60 to 80 kg per hectare, and it performs best under rainfed lowland conditions.

    FARO 44, on the other hand, is ideal if you’re looking for an early-maturing variety. It matures in 95 to 110 days, yielding around 4 to 5 tons per hectare. Like FARO 67, it has long to medium slender grains and is tolerant to iron toxicity. This variety is well-suited for irrigated lowland ecosystems, and you should aim for a seed rate of 60 to 80 kg per hectare.

    Choosing a variety without considering your ecology or market needs can lead to losses, so always match the seed to your setting.

    3. Prepare your land like it’s half the job—because it is

    Don’t rush into planting without a properly cleared and prepared field. The first step is land clearing, and this is where herbicides like Slasher Super and Gobara SG come in handy.

    Slasher Super is a contact and partly systemic non-selective herbicide with a longer residual effect. It contains Glufosinate ammonium 60% and Flumioxazin 6% WP, making it ideal for clearing dense weeds and bushy fields before planting.

    Gobara SG is another strong option. It’s a non-selective, systemic herbicide with 75.7% Glyphosate SG, designed to tackle both annual and perennial grasses, broadleaved weeds, and sedges. It’s particularly effective for preparing the land after the previous cropping season.

    After clearing, move on to ploughing and harrowing to loosen the soil. If you’re working in a lowland area, build bunds and level the land for uniform water retention. A well-levelled field not only supports even plant growth but also aids water control during irrigation.

    4. Control weeds early using the right herbicides

    Weeds are one of the biggest threats to rice productivity, especially in the early stages. For best results, combine pre-emergence and post-emergence herbicides in your weed management plan.

    Use Pendigold as a pre-emergence herbicide. Apply it immediately after planting or within 24 hours of planting to achieve the best results.

    For post-emergence, we recommend any of our products: Select, Selet Gold, Nominee Gold, and Actrox.

    5. Manage water as if your yield depends on it—because it does

    Rice is a thirsty crop, but too much water can cause just as much damage as too little. During the early stages, maintain shallow water levels (around 5 cm), increasing slightly as the plant grows.

    Drain water during the flowering period to prevent grain sterility and resume again after flowering. If you’re in an area where irrigation is necessary, schedule water cycles carefully. Good water management supports better root health, reduces weed pressure, and improves overall yield.

    Wrapping up,

    Getting started with rice farming isn’t as complicated as it may seem, but it does require planning, precision, and a willingness to learn. Start with a small plot to understand the process, and don’t cut corners when it comes to land preparation, weed control, or seed selection.

    Still not sure where to begin or what product is right for your farm? Reach out to us on any of our social media platforms—we are always ready to help. Or better yet, download the FarmPropa App and try the Product Recommender feature. It’s designed to guide you through product choices tailored to your crop, location, and specific farm needs—right from your phone.
  • Tired of Insect Problems? Find the Perfect Insecticide for Your Maize in Seconds with FarmPropa!

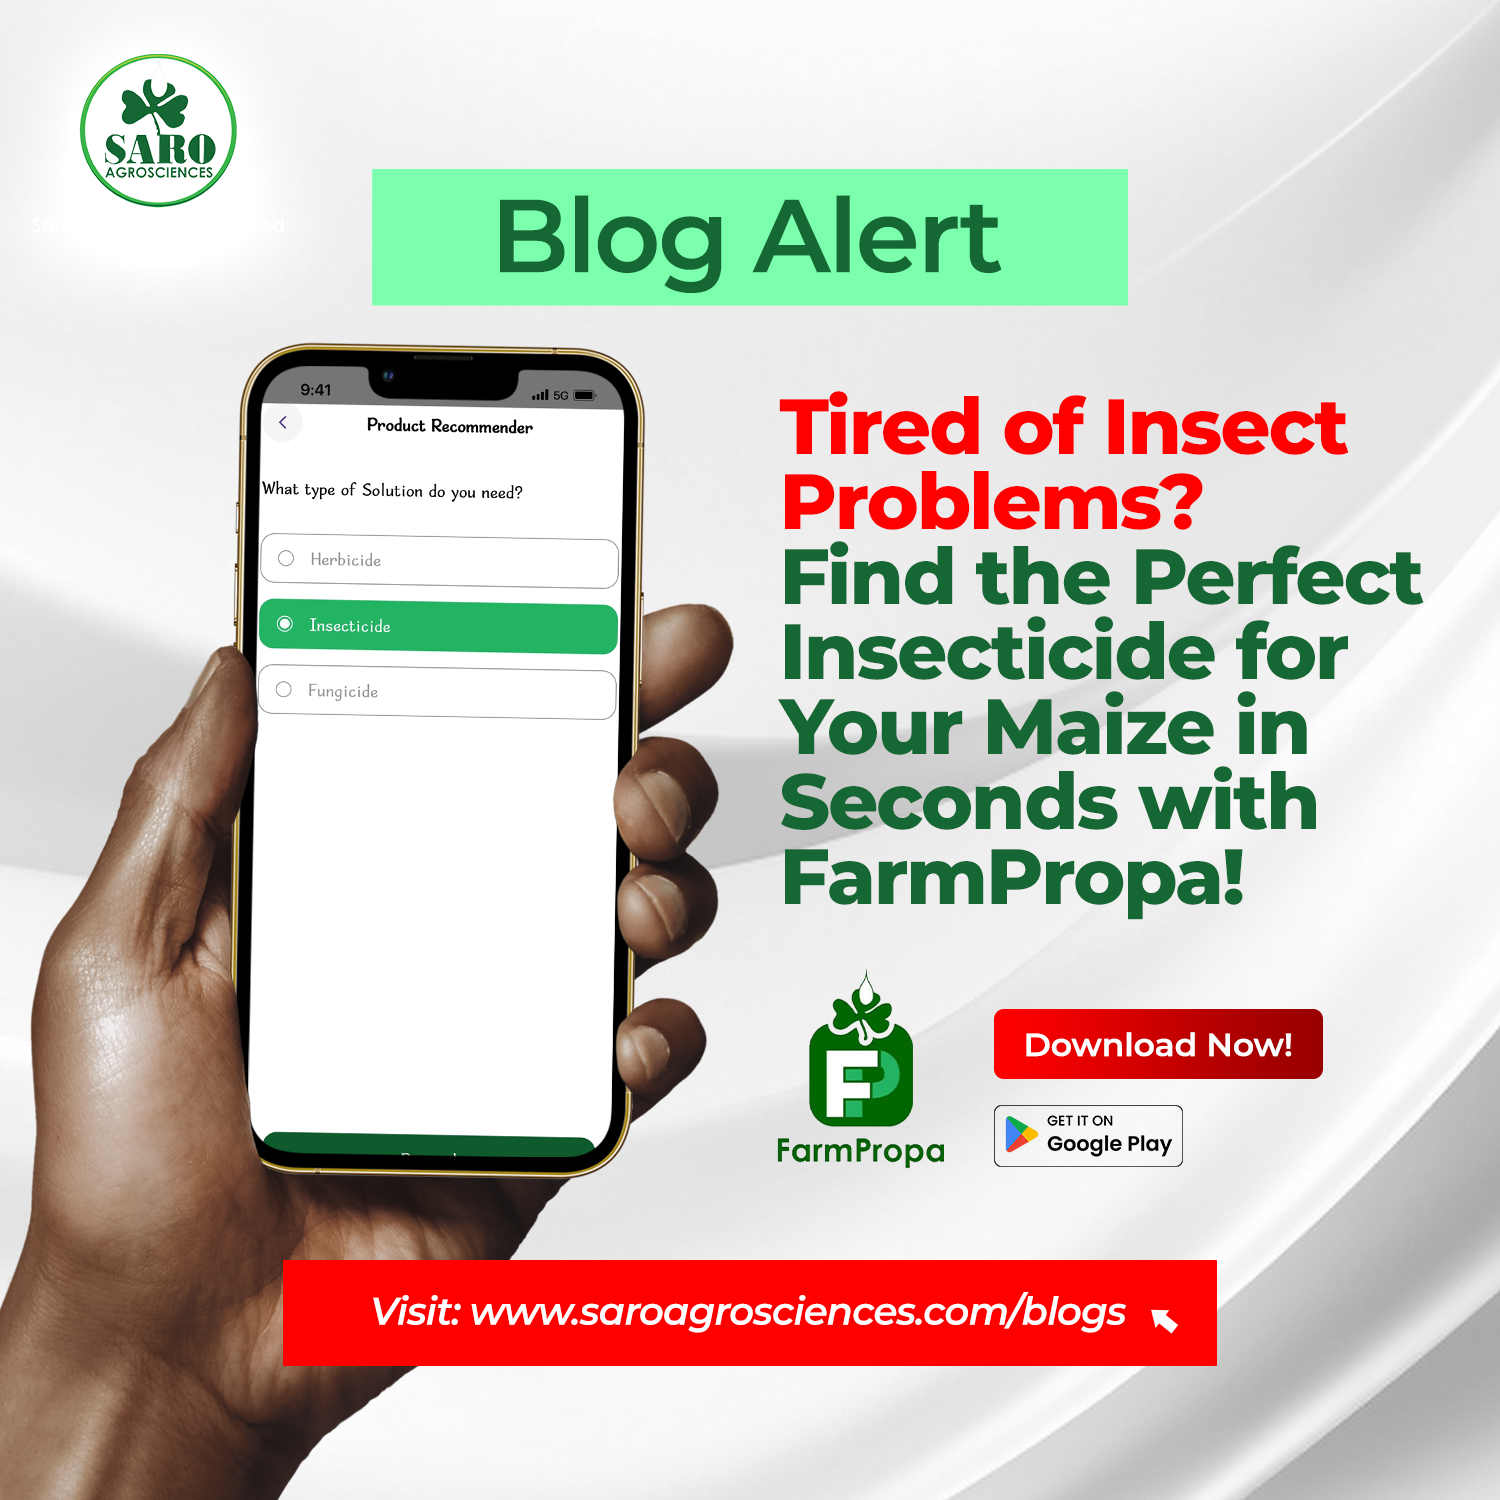
    Tired of Insect Problems? Find the Perfect Insecticide for Your Maize in Seconds with FarmPropa!

    Every farmer knows how quickly insects can ruin a good maize field. You work hard, plant right, and then pests come along, eating through your crops and cutting down your yield. Choosing the right insecticide to fight back can be confusing, but not anymore.

    Saro Agrosciences, your trusted farmer’s friend, has made things easier with FarmPropa, a simple, easy-to-use app that helps you find the right product for the exact problem on your farm.

    Here’s how to use the Product Recommender feature on FarmPropa to protect your maize and get the results you deserve:

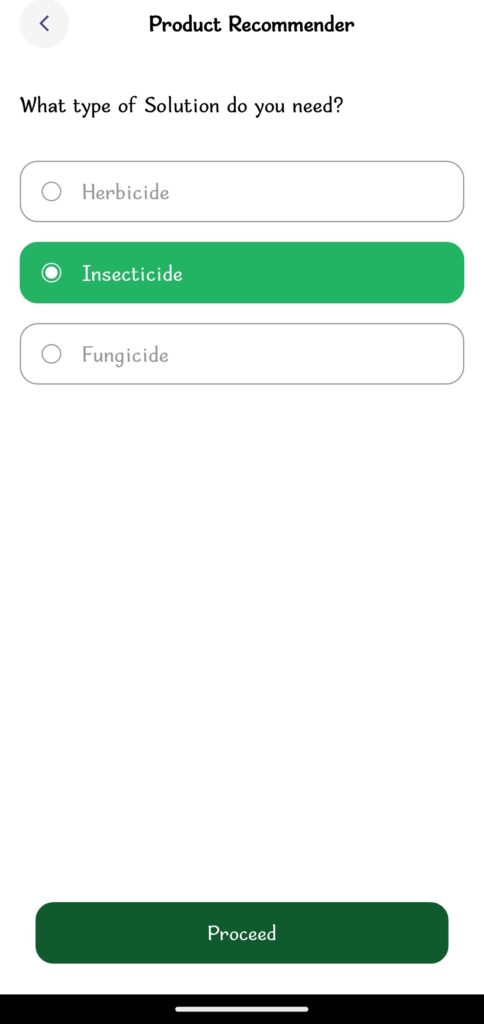
    Step 1: Tell the App What You Need

    When you navigate to the product recommender part of the FarmPropa app, the first thing it asks is what kind of solution you’re looking for. Since your maize is under insect attack, simply select insecticide.

    You can also use this same app to find herbicides or fungicides for other issues, but for now, we’re focusing on insect control.

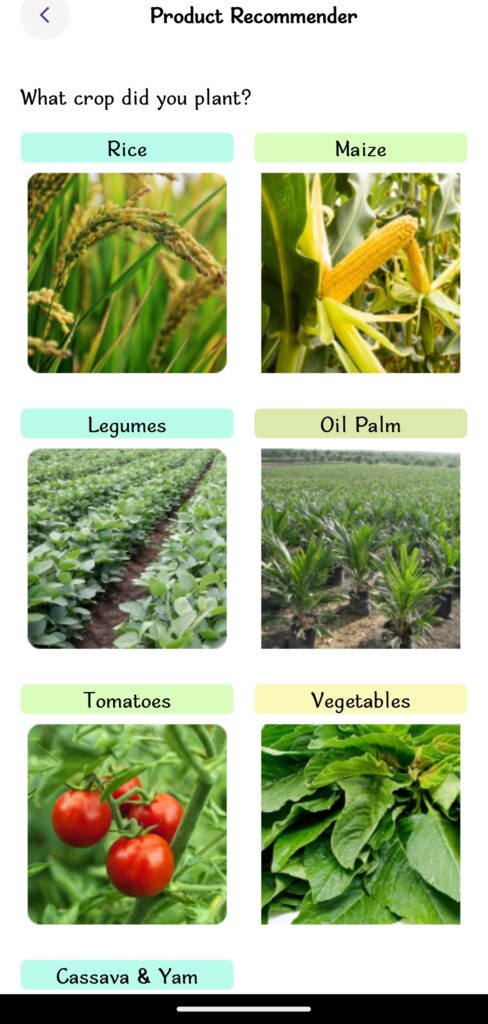
    Step 2: Select Your Crop

    Next, you’ll be asked to choose the crop of interest. FarmPropa supports many common Nigerian crops like rice, cassava, tomato, legumes, yam, oil palm, vegetables — and of course, maize.

    Once you click on maize, you’re on your way.

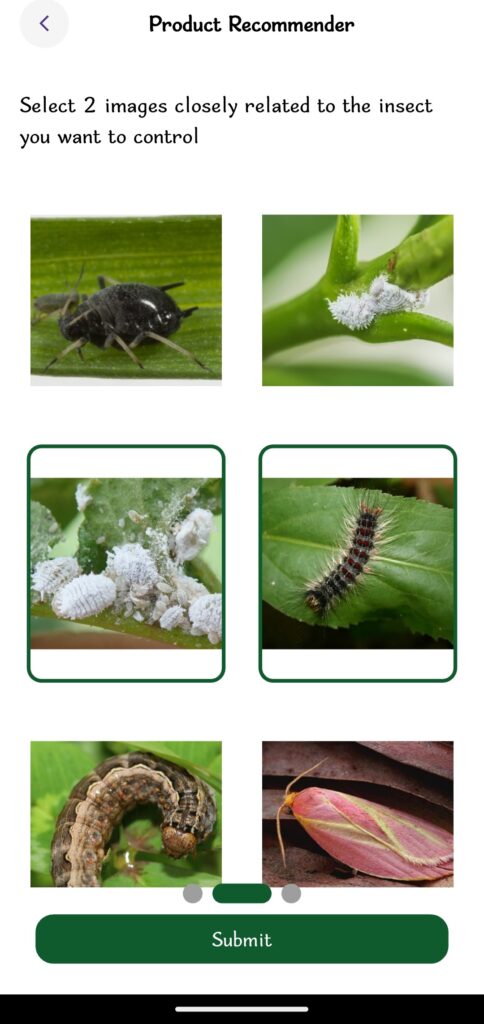
    Step 3: Pick Images of the Pests You See

    This is where the app gets very helpful. You don’t need to know the names of the insects damaging your farm. FarmPropa lets you select two pictures that look like the pests you’ve seen on your maize.

    Maybe it’s those tiny worms eating into your cobs, or some bugs chewing holes in your leaves, just find the images that match, and click them.

    Even if you’re not sure, the images makes it easy.

    Step 4: Get the Right Product Recommendation

    And just like that, voila!

    FarmPropa looks at all the details you’ve provided, the type of problem, the crop, and the insect, and gives you the best product to use. These aren’t random suggestions either. The app is backed by the experience and knowledge of Saro Agrosciences, which means the recommendations are reliable and effective.

    Wrapping up,

    FarmPropa takes the guesswork out of choosing insecticides. No more wasting time or money trying different products that don’t work. You now have a smart app at your fingertips, designed to support your hard work and protect your maize.

    At Saro Agrosciences, we believe farming should be rewarding, not frustrating. That’s why we created FarmPropa, because every farmer deserves good harvests, healthy crops, and peace of mind.

  • 4 Reasons Why Farmers Choose Saro Agrosciences And Why You Should Too!

    4 Reasons Why Farmers Choose Saro Agrosciences And Why You Should Too!

    Farming in Nigeria comes with its fair share of challenges. From unpredictable weather patterns to pest infestations, poor soil fertility, and rising costs of inputs, farmers are constantly seeking practical support, not promises. In farming, what matters most isn’t just having access to agricultural products. It’s having a dependable partner who understands the reality on the ground and walks with you through every season.


    That is where Saro Agrosciences stands tall — not just as a brand, but as a true friend of the farmer. For years, Saro has built a reputation across farming communities for putting farmers first. Whether you’re planting maize in Benue or spraying your rice field in Kebbi, farmers know they are not alone. When you call, someone answers. When you ask questions, you get real answers. And when you apply Saro products, you see results.


    Here are four reasons why farmers across Nigeria are choosing Saro Agrosciences — and why you should too.

    1. Real support beyond products
    Every farming journey is unique. That’s why Saro doesn’t just sell inputs and walk away. From the first time you reach out to us, you’re treated as a friend. Our agronomic team is active across our social media platforms, responding to questions quickly, no matter how technical or urgent they may be.


    We host regular FB Live sessions, Q&As, webinars, and expert takeovers to ensure you’re never left in the dark. Whether it’s advice on choosing the right pre-emergence herbicide or understanding pest behaviour, you’re one message or one click away from answers that work.


    We also maintain a growing blog resource centre filled with practical, localised information to help you eliminate guesswork in your operations.

    2. Our products are built for Nigerian soil and season

    From the North to the South, our agrochemical and seed solutions are formulated with a deep understanding of Nigeria’s diverse climate zones and farming conditions. We’re not rebranding foreign ideas, we’re designing solutions that work here, on your own soil, for your own crops.

    Our pre-emergence herbicides, for instance, target stubborn weeds before they even surface, while the post-emergence solutions clear unwanted growth without harming your crops. Insecticides like Sting, Kare, Hallakat, etc., keep your crops safe from pests that have devastated harvests in the past.

    3. We help you farm smarter with the FarmPropa app
    Saro Agrosciences is not only investing in agro-chemical solutions — we’re investing in tools to make your farming journey easier, more efficient, and more profitable.

    The FarmPropa App has been built as a comprehensive digital companion for farmers. It combines access to agronomic tips, weather forecasts, planting guides, pest alerts, input recommendations, and product usage calculators all in one place.

    The goal is simple: to help you plan better, act faster, and harvest more. Whether you’re a new farmer or a seasoned grower, the app is tailored to your real needs.

    4. We treat every farmer like a friend, not a transaction
    At Saro Agrosciences, we see farming as a shared mission, and farmers as the heartbeat of that mission. That’s why our relationship doesn’t end after you buy a product or solution. We stay close, offering follow-up advice, listening to your feedback, and providing ongoing education.

    Through our field days, activations, storms, demo farms, and grassroots outreach, we meet you where you are — in your own language, on your own terms. This is not by chance; it’s a deliberate effort to ensure every farmer feels heard, valued, and supported.
    For us, your growth is our priority. When you succeed, we all succeed.

    Why Should You Choose Saro Agrosciences?
    Because we don’t just want to sell to you — we want to grow with you. Our products are trusted. Our service is dependable. Our knowledge is grounded in your reality. And our future is focused on empowering you to grow more confidently and sustainably.
    Thousands of farmers already trust Saro Agrosciences as their friend. Maybe it’s time you did too.

  • Cassava Farmers: 3 Things You Should Always Do When Applying Herbicides.

    Cassava Farmers: 3 Things You Should Always Do When Applying Herbicides.

    For cassava farmers, weeds are one of the biggest threats to a healthy and bountiful harvest. If left unchecked, weeds can compete with cassava for sunlight, water, and nutrients, leading to poor yield and more work in the long run. One of the smartest ways to tackle this problem early is through the safe and effective use of herbicides, especially the use of pre-emergence herbicides like Rooter or post-emergence herbicides like Relianth and Gallant Super.

    This blog explains how to apply herbicides the right way, keeping your crops, your soil, and yourself safe.

    1. There is always an optimal application window, so timing is key.

    You can’t just apply herbicides at any random time and expect good results — timing is everything when it comes to effective weed control in cassava farming. The right timing depends on whether you’re using a pre-emergence or post-emergence herbicide, and applying them at the wrong time can lead to wasted effort, crop stress, or poor weed control.

    We recommend that:

    • Pre-emergence herbicides should be applied immediately after planting your cassava cuttings, before any weeds have started to sprout. For the best results, apply just before a light rain or lightly water the soil afterward to help activate the herbicide.
    • Post-emergence herbicides should be applied when weeds have emerged and are actively growing, ideally at the 3–4 leaf stage. Spraying too early may miss the target weeds, and spraying too late may lead to tougher, more resistant growth.

    Note: Avoid spraying when the soil is too dry, overly wet, or right before a heavy rain, as it can wash away the herbicide and reduce its effectiveness.

    2. Always follow the instructions on the label

    Some farmers think that using more herbicide will give better results, while others believe using less will help save money. But the truth is, both ideas can lead to problems. If you use too much herbicide, you can damage your cassava plants, harm the soil, and affect future harvests. If you use too little, the weeds may survive, and you’ll end up spending more time and money spraying again.

    It’s important to get the quantity just right.

    If you’re not sure how much to use, don’t guess. Always check the instructions on the label. And if you’re still unsure, feel free to reach out to us on any of our social media pages or speak to the nearest agricultural extension officer.

    Note: We recommend using only clean water for mixing/diluting the herbicides.

    3. Safety first: your health is as important as your harvest.

    When spraying herbicides, it’s important not to take chances with your health or the environment. Saro Agrosciences herbicides are made with safety in mind and are generally safe when used correctly. However, proper handling is still very important to avoid unnecessary risks.

    Always follow these safety steps:

    • Wear long-sleeved clothing, gloves, boots, and a face mask to protect your skin and lungs
    • Keep children, pregnant women, and animals far away from the spraying area
    • Walk backwards while spraying so you don’t step on areas you’ve already treated
    • After application, wash your sprayer thoroughly with clean water and safely store leftover herbicide in a cool, dry place away from food and children
    • After application, do not forget to wash your hands, clothes, and equipment after use.

    Note: Avoid spraying on windy days to reduce drift onto nearby crops or people.

    Herbicides are a valuable tool for cassava farmers. They help save time, reduce labour, and boost yields — but only when used the right way. Don’t take chances with guesswork or shortcuts. We’re here to support you with the right information and products every step of the way.

  • How to Care for Your Cassava Farm after Planting: 5 Key Practices

    How to Care for Your Cassava Farm after Planting: 5 Key Practices

    Planting cassava is only the beginning. Many farmers think the hard part is over once the stems are in the ground, but that’s not true. What happens after planting can make or break your harvest. From weeds to pests and poor soil nutrition, your cassava needs regular care to grow well and produce strong tubers.

    If your cassava is already planted, here are five simple things you can do to improve your chances of a good harvest.

    1. Watch your weeds early

    Weeds compete with your cassava for food, water, and sunlight. The first three months after planting are the most important. If weeds take over, your tubers will suffer.

    If you want to reduce stress and labour:

    A. Use Rooter herbicide immediately after planting (I.e., as a pre-emergence herbicide).

    B. Use Relianth to control grasses; it is a good post-emergence option to control grasses without harming your cassava.

    C. If you planted cassava with maize, Vigor is your best pre-emergence choice.

    D. For post-emergence control in intercropped cassava and maize older than 12 weeks, do a controlled spraying of Slashagold using a spray guard.  However, please be sure it doesn’t touch the cassava or maize leaves.

    2. Feed your soil

    Cassava is strong, but it still needs nutrients to grow big tubers. Many farmers lose yield simply because the soil is tired.

    • Add compost or well-rotted manure to improve soil health.
    • You can also use fertilizers with a good balance of nutrients. Something like NPK 15-15-15 works, especially during the second month.

    Pro tip: Pay special attention to potassium. It helps your cassava form bigger and better roots.

    3. Check for pests and disease

    Some farmers wait until it’s too late to deal with pests and diseases. You can’t afford to do that.

    Look out for signs like yellow leaves, spots, twisted stems, or stunted plants. Common problems include cassava mosaic and bacterial blight.

    Remove and burn infected plants quickly so they don’t spread to others; make sure to use clean planting materials next season. Choose Termex or Solitex insecticide to control insect pests. Use Blue Snow to control fungal diseases.

    4. Fill In gaps early

    Sometimes, cassava stems fail to grow after planting. Don’t ignore empty spots in your field.

    Replace any missing or weak plants early, preferably within the first month. This helps your farm grow evenly and reduces open spaces where weeds can grow.

    5. Manage water properly

    Cassava doesn’t like too much water, but it also doesn’t like to dry out completely when young.

    • If you’re in a dry area, try mulching to keep the soil moist.
    • If your soil floods easily, make sure water drains well. Cassava roots rot quickly in waterlogged soil.

    Got questions or need help choosing the right herbicide? Send us a message through our social media pages or on the FarmPropa app. We are always here to support you at every stage of your cassava journey.