Author: admin

  • How to Achieve Better Harvest with Crop Rotation

    How to Achieve Better Harvest with Crop Rotation

    Modern farming is no longer just about planting, harvesting, and repeating the cycle. The soil itself needs attention, and one of the oldest yet most effective strategies to keep it productive is crop rotation. This practice, when done right, not only improves yield but also results in healthy soil.

    In this week’s blog, we break down how crop rotation improves soil health and why it should form a key part of your farming schedule.

    1. Breaking Pest and Disease Cycles

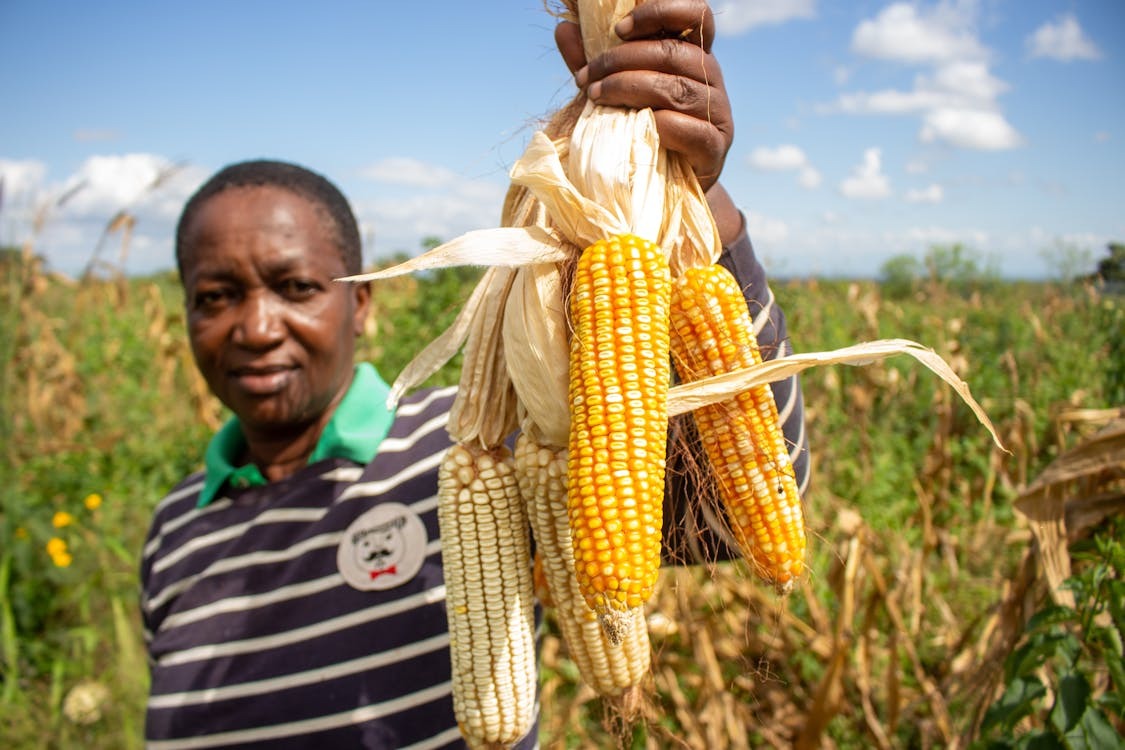
    When farmers grow the same crop year after year (a practice called monocropping), pests and diseases that attack that crop quickly build up in the soil. For example, if you plant maize continuously, maize stalk borers and soil-borne diseases will increase over time.

    By rotating crops – say, cereals with legumes or tubers, you disrupt the cycle. Many pests and pathogens that thrive on one crop simply can’t survive when another replaces it. This natural break reduces infestations and disease pressure, meaning farmers can spend less on pesticides and enjoy healthier crops.

    2. Natural Soil Fertility Boost

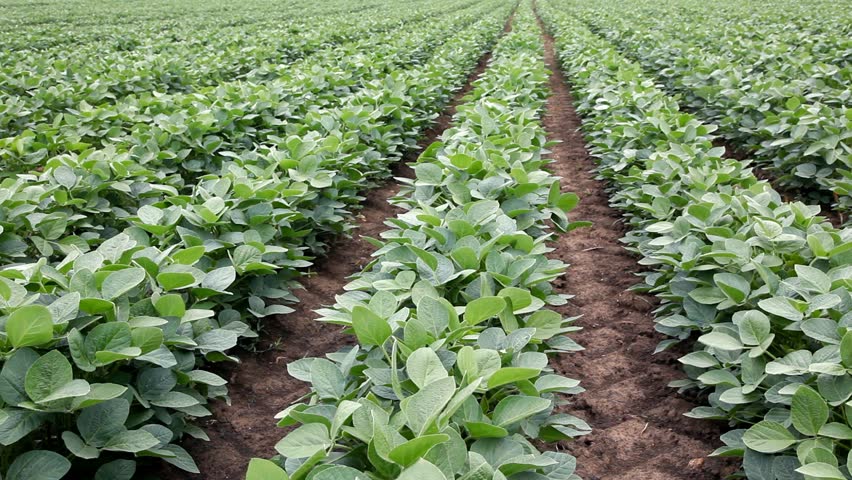
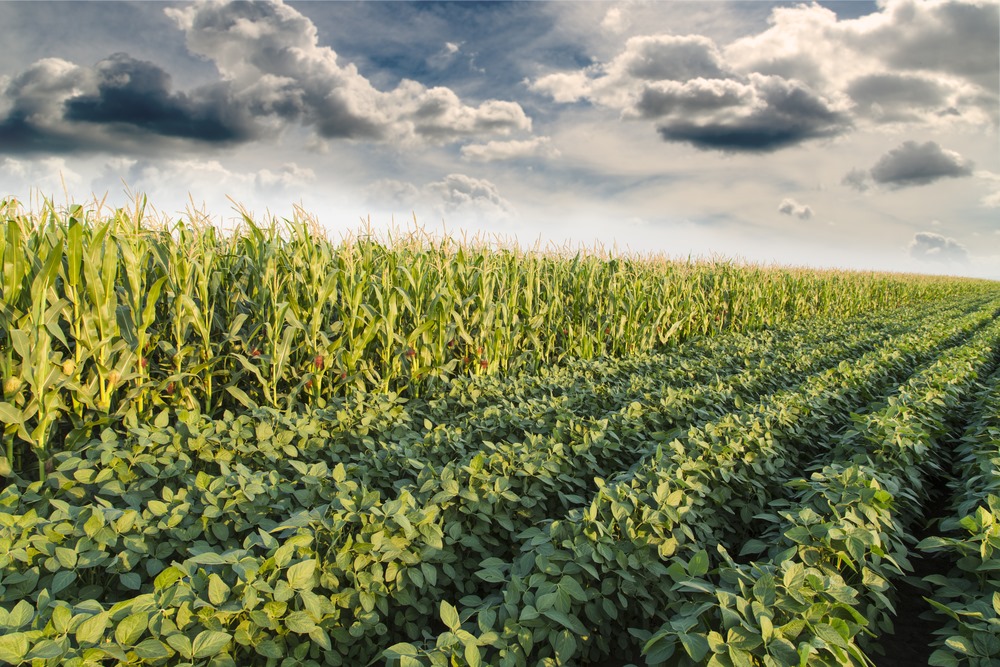
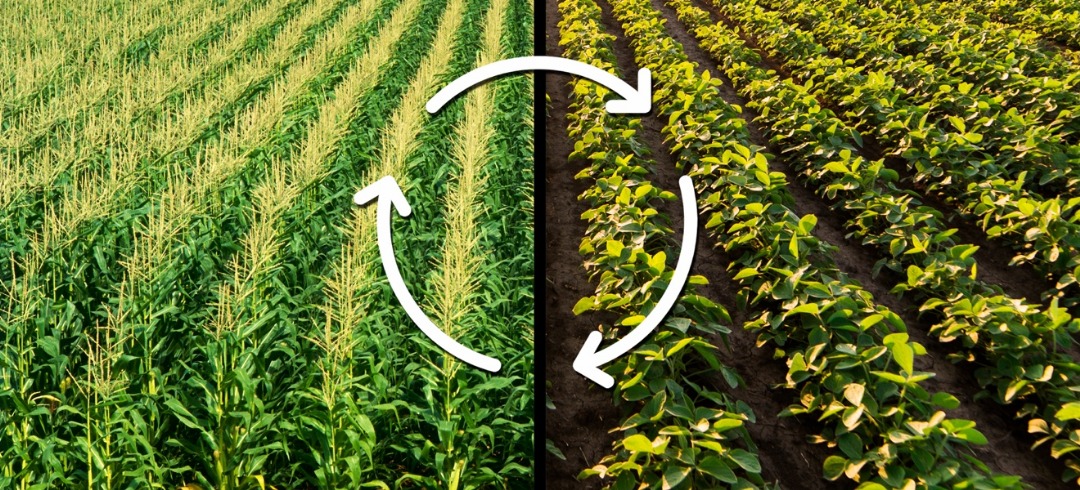
    Different crops draw nutrients differently. Cereals consume lots of nitrogen, tubers like cassava demand potassium, and vegetables have their own nutrient needs. Rotation helps balance this usage so the soil doesn’t get exhausted. For instance, planting maize after soybean or cowpea often results in better yields because the maize benefits from the nitrogen left behind in the soil.

    3. Improving Soil Structure and Organic Matter

    Soil is a living system. Continuous monocropping drains it of organic matter and weakens its structure. Rotation helps restore balance. Deep-rooted crops open up the soil, improving aeration and water infiltration, while crop residues decompose into organic matter that strengthens soil texture and moisture holding capacity.

    4. Preventing Soil Erosion

    Rotating with crops that provide ground cover protects soil from erosion. Their canopy shields the surface from raindrop impact, while their roots hold the soil together, preserving valuable topsoil where nutrients are most concentrated.

    5. Promoting Biodiversity in the Soil

    Healthy soil is alive with organisms, bacteria, fungi, earthworms, and other microfauna. Crop rotation, especially with legumes, introduces different root exudates and organic materials that feed a diverse community of soil organisms. This biodiversity helps suppress harmful pathogens, enhances nutrient cycling, and keeps the soil ecosystem resilient.

    Practical Crop Rotation Ideas

    • Maize–Soybean Rotation: Farmers who rotate maize with soybean often see higher maize yields due to improved nitrogen and reduced disease pressure.
    • Cassava–Groundnut Rotation: Cassava’s high nutrient demands are supported by groundnut’s soil-enriching effect.
    • Rice–Vegetable Rotation: Upland rice rotated with tomatoes, peppers, or leafy vegetables improves soil structure and reduces rice-specific disease cycles.
    • Yam–Cereal Rotation: Alternating yam with cereals helps cut down yam pests and balances nutrient use.
  • Herbicides and Legumes: Do’s and Don’ts Every Farmer Should Know

    Herbicides and Legumes: Do’s and Don’ts Every Farmer Should Know

    Farming legumes like beans, soybeans, or groundnuts is rewarding, but weeds can destroy the effort made; they steal water, sunlight, and nutrients from your crop, leaving you with poor harvests. That’s why using herbicides the right way is very important.

    At Saro Agrosciences, Buster (a pre-emergence herbicide you use after planting but before weeds come up) and Twig (a post-emergence herbicide you use when weeds are already showing). are very effective in helping to protect your legumes at the right time, but only if you apply them correctly.

    Here are the dos and don’ts every farmer should know and adhere to before their next herbicide application on a leguminous farm.

    The Do’s (What You Should Do)

    1. Use the right herbicide at the right stage: Before planting, make sure you clear the field with land-clearing herbicides like Slasher, Slasher Super or Gobara SG. These are non-selective herbicides, which means they kill every plant they touch. That’s why they must be used before planting, if you spray them after, they will wipe out your crop completely.

    Right after planting your legumes, apply Buster quickly to stop weeds from coming up and to keep the field clean from the start. If you miss this early application window, don’t worry. Wait until the weeds show, then use Twig to clear them safely without harming your beans, soybeans, or groundnuts.

    Remember: timing is everything. Using these herbicides at the wrong stage will not only reduce their effect but can also harm your crop. Follow the right order, and your farm will thank you with a better harvest.

    2. Measure and mix correctly: STRICTLY follow the instructions on the label when it comes to dosage. Using the right amount is the only way to get the best results. If you use more than required, you will not get a better outcome; instead, you risk destroying your crops and harming the soil and environment. On the other hand, if you use too little, the weeds will survive, and all your effort and money will be wasted.

    The simple rule is this: don’t guess, don’t underdo, don’t overdo, just follow the instructions on the label.

    3. Spray at the right time of day: Spray in the morning or evening when the sun is not too hot, the wind is calm, and no rain is expected. This helps the herbicide work better and reduces waste.

    The Don’ts (What You Should Avoid)

    1. Don’t mix herbicides carelessly: Unless the label or an expert says it is safe, never combine two different herbicides. Wrong mixtures can destroy your crop or reduce effectiveness. If you must mix, make sure to reach out to us for more details.

    2. Don’t forget to wear PPE while spraying: Always wear boots, gloves, and a face cover. Wash your sprayer, hands, and clothes immediately after spraying. Protecting your health is as important as protecting your crops.

    3. Don’t keep herbicides near food, children, or animals: store them separately in a safe, dry place. Herbicides are dangerous if swallowed or touched.


    In conclusion,

    Herbicides are great. But how you apply them is just as important as the product itself. Want more tips, simple guides, and expert advice on protecting your crops? Download the FarmPropa App today and carry knowledge with you everywhere you go.

  • Maize and Legume Intercropping: A smarter way to grow more with less risks.

    Maize and Legume Intercropping: A smarter way to grow more with less risks.

    If you have been farming for a while, you know no two seasons are the same. One year, your crop grows beautifully. The next, pests, drought, or low market prices leave you counting losses. For that reason, relying on just one crop is risky. That’s why intercropping, the practice of growing two or more crops together on the same farm, is considered a smart move.

    And when it comes to good combinations, few pairs work better than maize and legumes. This guide will show you why this pairing works, how to do it step-by-step, and how to avoid common mistakes so you can get better yields, protect your soil, and reduce your farming risks.

    Why Maize and Legumes Make a Great Team

    1. Legumes naturally feed the soil: Through a process called nitrogen fixation, legumes pull nitrogen from the air and store it in the soil. Maize loves nitrogen, so this gives it a natural boost without extra chemical fertilizer.
    2. Maize offers support: Tall maize stalks can give climbing legumes (like beans) something to lean on and can also protect delicate crops from harsh sun or strong winds.
    3. You get two harvests in one go: Even if pests or drought hurt one crop, the other can still give you food to eat and produce to sell.
    4. Weed and pest control is easier: The mixture of crops covers the ground, making it harder for weeds to grow and disrupting pest life cycles.

    How to Intercrop Maize and Legumes for Bigger Harvests and Less Risk

    1. Pre-planting: Before you start planting, keep these principles in mind:

    1. Avoid overcrowding: If crops are too close, they’ll fight for sunlight, water, and nutrients. Give both maize and legumes enough breathing space.
    2. Pay attention to the varieties selected: Short maize with shade-loving legumes works well. If your maize grows tall, consider planting a legume that tolerates shade or wait until it’s taller, so it can catch enough sunlight.
    3. Prepare the land properly: Endeavour to properly clear the land of weeds, stumps, and stones before planting. Doing this correctly is very crucial, and our Glyphosate (Gobara, Gobara SG, Uproot, Sarosate) and Glufosinate (Slasher, Slasher Super, SlashaGold) solutions are equally effective options to use for this.

    2. Planting: There are two main types of intercropping, row and strip intercropping; it is important to consider both against your options before making a choice.

    • Row Intercropping: In this system, you plant the maize in rows and the legumes between the rows made. Ideally, spacing for the maize rows should be 75–90 cm apart, while for the legumes, it should be 20–30 cm apart within their row.

    Note that this system is best suited for smaller farmlands, as it helps to manage space without affecting the planted crops.

    • Strip Intercropping: In this system, the crops are planted in alternating rows. Ideally, 2–4 rows of maize are followed by 2–4 rows of legumes, with the pattern constantly repeated across the field.

    This system is a great option for those with large farms, making it easier to weed or apply crop protection products to specific portions of the farmland.

    Once you decide on the mode of planting, make sure to time your planting to suit both crop varieties you have. We recommend planting maize first and waiting a short while (about 2 weeks) to plant the legumes.

    1. Post-Planting: Fertilize wisely; maize needs an early boost—apply NPK 15:15:15 or a suitable starter at 2–3 weeks after planting. Make sure to avoid overusing nitrogen fertilizers because they reduce the legume’s ability to fix its own nitrogen.

    Note that it is important to stay vigilant to keep weeds and pests under control. Also, scout for common insect pests like fall armyworm in maize and pod borers in legumes and control with fitting insecticide options like Hallakat and Kare (for maize) and Sting, Kombat, or Cypertex (for beans). Finally, note that maize often matures before legumes. Harvest it first, then let the legumes finish drying on the plant. Once done, dry both crops properly before storage to prevent mold or insect damage.

    In conclusion,

    Intercropping maize and legumes is not just a clever farming trick—it’s a proven way to get more food, protect your soil, and keep your income steady even when the season throws surprises at you.

    Start small, track your results, and fine-tune your spacing and timing. With every season, your soil will get richer, your harvest more abundant, and your risk much lower.

  • Top 5 Legumes With High Market Demand in Nigeria Right Now

    Top 5 Legumes With High Market Demand in Nigeria Right Now

    Legumes are profitable. Whether you’re a smallholder farmer looking to boost income, a trader seeking fast-moving commodities, or an agribusiness investor searching for scalable opportunities, legumes offer a smart path forward.

    Why? Because they’re versatile. Nigerians eat them, export them, use them for animal feed, and process them into everything from cooking oil to baby food. Legumes also enrich the soil, making them an ideal addition to crop rotation systems, especially in a country where fertiliser costs keep rising.

    But not all legumes are equal when it comes to market value. Some are in steady demand year-round, others spike seasonally, and a few are quietly becoming Nigeria’s next agri-cash crop. So, which ones are truly worth your time, land, and investment?

    Here are the top 5 legumes currently in high demand across Nigerian markets:

    1. Soybeans

    Why it’s in demand:
    Nigeria’s growing food processing industry can’t get enough soybeans. It’s a key ingredient in baby food, cooking oil, livestock feed, and even plant-based milk.

    Soybeans grow well in the North and parts of the Middle Belt. If you can time your planting well with the rains and keep weeds under control, the returns are solid, especially when sold in bulk.

    Who’s buying:

    • Feed millers
    • Oil producers
    • Exporters (especially to Asia and North Africa)

    2. Cowpea (White Beans)

    Why it’s in demand:
    Cowpea (Beans) is a Nigerian kitchen essential. From Akara to moi-moi and rice-and-beans, they’re everywhere. White beans are especially preferred in most homes and restaurants. Cowpea prices usually shoot up during the dry season. Consider storing and selling later for better profits.

    Who’s buying:

    • Local markets (steady demand)
    • Food vendors and bulk caterers
    • Exporters (especially to neighbouring West African countries)

    3. Groundnut (Peanut)

    Why it’s in demand:
    Besides being a household snack, groundnut is used for oil production, animal feed, and confectionery. It’s a multi-use crop with strong value chain opportunities. For instance, groundnut cakes (kuli-kuli) are in high demand in the north and some southwestern states, and processing them can add extra income.

    Who’s buying:

    • Oil mills
    • Snack manufacturers
    • Exporters (especially for raw shelled nuts)

    4. Bambara Nut (Okpa)

    Why it’s in demand:
    Bambara thrives in poor soils and is drought-tolerant, making it a low-risk, high-reward crop in the right zones. Though less mainstream compared to other legumes on this list, Bambara nut is gaining traction, especially in the South East and parts of the South-South, for its use in making Okpa, a popular delicacy.

    Who’s buying:

    • Local processors and food sellers
    • Nutritionists and food companies (for its high protein profile)
    • Exporters targeting niche African food markets

    5. Pigeon Pea (Fio-fio)

    Why it’s in demand:
    Popular in parts of the East and Middle Belt, pigeon pea (fio-fio) is gradually entering urban food markets due to rising interest in local delicacies and healthier eating. Demand spikes during cultural festivals and off-season periods. With some storage, you can cash in big.

    Who’s buying:

    • Local markets in the East
    • Urban grocers and health-conscious consumers
    • Exporters (especially to India and Caribbean markets)

    Wrapping up,

    As food inflation rises and Nigerians become more intentional about their food choices and cultivation, legumes will continue to play a key role. They are nutritious, profitable, and sustainable, a rare trio in today’s farming world.

    So whether you’re planting, processing, trading, or exporting, these 5 legumes should be on your radar. Start small, study your market, and grow smart. The demand is already there, what’s left is for you to plug in.

  • What Next After Harvesting Maize? (5 Key Steps to Take)

    What Next After Harvesting Maize? (5 Key Steps to Take)

    For many farmers across the southwestern states, especially those who planted maize earlier in the year, harvest season is already in full swing. And honestly, there’s nothing like that feeling—watching those full cobs come off the stalk, knowing the months of hard work, sweat, and prayer have paid off.

    Now, while some people grow maize mainly for family consumption (subsistence farming), many others do so with a clear goal: to earn a profit (commercial farming). Whether to fulfill personal or family responsibilities, restock the farm, or just turn in a decent profit, farming is business. And if that’s your mindset, then this blog is especially for you.

    Let’s walk through 5 key steps you should take right after harvesting maize to protect your yield, maximize profits, and prepare for the next cycle.

    1. Proper Drying – Don’t Let Moisture Ruin Your Effort

    Freshly harvested maize contains a lot of moisture—usually between 18% and 30%. If not dried properly, it can develop mold or aflatoxins (toxic compounds that make the maize unsafe for consumption and unfit for market). That’s money lost and health risks introduced.

    What to do:

    • Sun-dry your maize on clean, dry surfaces (like tarpaulin, mats, or concrete floors). Avoid drying directly on bare ground—it can contaminate the grains.
    • Spread it thinly and turn regularly for even drying.
    • Aim for a moisture content of about 13% for safe storage. You can use a moisture meter (handheld ones are quite affordable now) or perform a bite test if you’re very experienced with the process.
    • If you’re drying on a large scale or during rainy season, consider mechanical dryers or drying services where available.

    2. Keep It Neat, Keep It Market-Ready

    Once the maize is dry, the next step is to remove the kernels from the cob, a process called shelling. For small farms, manual shelling (using hands or hand-held shellers) might work. However, larger farms should opt for mechanical shellers to save time and reduce grain breakage.

    After shelling, ensure that you clean the maize to remove dust, chaff, stones, or broken kernels. A simple sieve or blower can go a long way.

    Clean, well-shelled maize not only looks better, but it also fetches better prices and reduces the risk of spoilage during storage.

    3. Store Properly to Protect Your Hard-Earned Harvest

    Don’t just dump your maize into sacks and forget about it. Post-harvest pests like weevils and rodents can wreak havoc if you’re not careful.

    Best practices:

    • Use clean, dry, and airtight bags (preferably polypropylene or hermetic storage bags like PICS bags).
    • Store in a cool, dry place, off the ground and away from direct sunlight or rain.
    • Consider treating maize with natural preservatives like neem leaves or food-safe pesticides if you’re storing it for a long time.
    • For bulk storage, invest in metal silos or grain banks.

    Pro tip: Always label your storage bags with the harvest date, moisture level, and treatment (if any). This helps you monitor and rotate stock.

    4. Timing is everything!

    Now that your maize is safe, you need to decide: sell immediately, store for better prices later, or add value?

    If you chose option A (sell immediately):

    This is common during harvest season but often yields lower prices due to market glut.

    • If you must sell, compare prices across buyers—local markets, aggregators, processors, and even online platforms.

    For the second option B (storing to sell later):

    Prices may go up after the harvest season. If you have secure storage, waiting a few months may significantly increase your income.

    For option C (processing/value addition), here are a few ideas if you want to earn more and maybe explore agribusiness:

    • Process maize into flour (pap/ogi), animal feed, or grits.
    • Package and brand your products for local or urban markets.
    • Even simple cleaning, grading, and bagging can add value.

    5. Start Planning for Next Season Now

    Many farmers wait until the rains are almost here before thinking about land preparation. That’s a big mistake. What you do between harvest and the next planting season often determines how successful your next harvest will be.

    Key post-harvest field activities:

    • Clear the residue: Dry stalks and roots should be removed or ploughed back if you’re practicing conservation farming.
    • Soil testing: Find out what your soil needs; don’t just assume. Is it nitrogen-deficient? Is the pH too low?
    • Apply compost or manure: Improve soil fertility ahead of the next season.
    • Fix drainage or irrigation channels: If you noticed waterlogging or poor water supply last time, fix it now.
    • Plan crop rotation: Avoid planting maize back-to-back on the same field. Rotate with legumes (like soybeans or cowpeas) to fix nitrogen and break pest cycles.

    Wrapping up

    Harvesting maize is just the halfway mark. If you want to get the best returns—whether as a subsistence farmer or agribusiness owner—you need to handle post-harvest steps with the same seriousness as planting.

    Dry well. Store smart. Sell right. Plan ahead.

    You’ve already done the hard part. Now it’s time to protect your profit and set yourself up for an even better next season.

  • Rainfed or Irrigated, What is the best way to grow your rice?

    Rainfed or Irrigated, What is the best way to grow your rice?

    Every rice farmer understands one key fact, water is essential. Rice doesn’t just like water; it needs a lot of it. From the moment it’s planted until harvest, rice depends on steady moisture to grow well. In the past, farmers relied on rainfall to meet this need. But today, many have come to accept that the rains are no longer as reliable as they once were.

    With shifting weather patterns, lower humidity, unpredictable rainfall, and longer dry seasons, depending only on rainfall has become a big gamble. That’s where irrigation comes in, the controlled supply of water through man-made systems. Whether it’s canals, pumps, boreholes, or sprinklers, irrigation gives farmers better control over water, even during the hottest, driest periods.

    In this blog, we’ll explore the major differences between rainfed and irrigated rice farming, looking at water needs, infrastructure, expected yields, labour demands, and how each method can affect your income. Whether you’re already in the middle of your farming season or just getting started, this guide will help you make smarter, more sustainable choices for your farm.

    Let’s start with the most obvious factor to consider.

    1. Where does your water come from?

    Your rice can only grow as well as your water source allows. If your farm relies solely on rainfall, then you have little control over when and how much water your crop gets. That can be risky, especially with climate change making rainy seasons shorter or less predictable.

    If your area has regular rain, rainfed farming might still work, but if you’ve noticed drier spells or delayed rains, you may need to start exploring backup options. Irrigation gives you that control: with canals, boreholes, or pumps, you can supply water when nature doesn’t.

    2. Yield potential can be affected by irrigation

    Irrigated rice fields usually produce more rice, more often. With water always available, your plants stay healthy, and you can even farm two or three times a year. Rainfed farms can still do well, but they depend on the weather. One bad season, and your yield may drop.

    Our recommendation is to have a mix of both systems, with the artificial setups supplementing/covering for periods where weather patterns may fluctuate between great and not-so-great.

    3. Think beyond this season

    Rainfed farming is cheaper upfront, but puts your whole harvest at the mercy of the weather. Late rains? You’re planting late. A mid-season drought? Your crop may not recover. Irrigation gives you the power to decide when to plant, how often to water, and how long to grow. Yes, it costs more, but it reduces the chances of losing your crop completely through dry-season farming, vegetable rotation, or fish-rice integration, options that can potentially bring in more money and reduce risk.

    4. Choose what fits based on your farm

    We cannot emphasize this enough: Your farm is unique; what works for someone else’s land or region may not work for you. So, your preferred approach to managing it should be based off its requirement rather than simply following the crowd.

    Maybe your soil holds water well and your area gets consistent rain; then rainfed might be enough. But if your fields dry out quickly, or your rains are less reliable, then it’s time to ask: how long can I keep farming this way? Just make sure to pay attention to your rainfall pattern, soil type, finances, and goals. Choosing the right method isn’t about following the crowd; it’s about knowing your land and planning wisely.

    Because at the end of the day…
    Both rainfed and irrigated rice systems are valid. They each have their strengths and challenges, and what works best depends on your farm’s location, your budget, your risk tolerance, and even the type of rice you’re growing. One offers simplicity and lower input costs; the other promises consistency and higher yields, but at a price. Whether you rely on the sky or build your own system underground, how you water your rice fields plays a big role in how much you harvest and how much peace of mind you have while doing it.

    Where possible, we recommend combining both methods—i.e., using rainfall when it’s available and supplementing with irrigation when it’s not, for more resilient, productive farming.

  • From Seed to Planting: Getting Your Rice Farm Started the Right Way

    From Seed to Planting: Getting Your Rice Farm Started the Right Way

    Rice is one of the most widely consumed staples in Nigeria, and local production still struggles to meet rising demand. For anyone looking to grow a profitable and high-demand crop, rice is a smart choice. And if you’re waiting for the perfect time to start, this is it. Rice thrives in waterlogged conditions, especially in rainfed lowland areas, and the natural rainfall this season provides exactly what the crop needs to grow strong and yield well. If you haven’t already gotten started, now is the time to take that first step.

    Whether you’re new to rice farming or not, this blog will walk you through the key things you need to know: choosing the right seed variety, preparing your land, managing weeds, protecting your crop, and harvesting for profit. Let’s get into it.

    1. Understand your land before you plant

    Every successful rice farm starts with knowing your soil and your environment. Rice thrives best in warm, humid climates with an abundant water supply, which makes areas in the lowland tropics especially suitable. Your first task should be a soil test to determine fertility, pH, and any nutrient deficiencies. Rice does best in slightly acidic to neutral soil, ideally between 5.5 and 7 pH. This allows you to know exactly what your soil needs before planting begins—whether it’s lime to raise pH or organic compost to boost fertility.

    If your farm is located in a rainfed or irrigated lowland area, your rice crop will likely flourish, provided you manage the water well.

    2. Choose the right rice variety for your location and goals

    Picking the right seed variety makes all the difference. Your choice should reflect both your ecological zone and the kind of yield you want to achieve.

    FARO 67 is a standout option for many farmers. It’s a high-yielding variety, capable of producing up to 6.7 tons per hectare. This variety features long to medium slender grains and takes about 120 to 125 days to mature. It’s moderately tolerant to iron toxicity and can survive temporary submergence. FARO 67 is especially recommended for Derived, Guinea, Sudan, and Sahel savanna ecologies. Its seed rate is around 60 to 80 kg per hectare, and it performs best under rainfed lowland conditions.

    FARO 44, on the other hand, is ideal if you’re looking for an early-maturing variety. It matures in 95 to 110 days, yielding around 4 to 5 tons per hectare. Like FARO 67, it has long to medium slender grains and is tolerant to iron toxicity. This variety is well-suited for irrigated lowland ecosystems, and you should aim for a seed rate of 60 to 80 kg per hectare.

    Choosing a variety without considering your ecology or market needs can lead to losses, so always match the seed to your setting.

    3. Prepare your land like it’s half the job—because it is

    Don’t rush into planting without a properly cleared and prepared field. The first step is land clearing, and this is where herbicides like Slasher Super and Gobara SG come in handy.

    Slasher Super is a contact and partly systemic non-selective herbicide with a longer residual effect. It contains Glufosinate ammonium 60% and Flumioxazin 6% WP, making it ideal for clearing dense weeds and bushy fields before planting.

    Gobara SG is another strong option. It’s a non-selective, systemic herbicide with 75.7% Glyphosate SG, designed to tackle both annual and perennial grasses, broadleaved weeds, and sedges. It’s particularly effective for preparing the land after the previous cropping season.

    After clearing, move on to ploughing and harrowing to loosen the soil. If you’re working in a lowland area, build bunds and level the land for uniform water retention. A well-levelled field not only supports even plant growth but also aids water control during irrigation.

    4. Control weeds early using the right herbicides

    Weeds are one of the biggest threats to rice productivity, especially in the early stages. For best results, combine pre-emergence and post-emergence herbicides in your weed management plan.

    Use Pendigold as a pre-emergence herbicide. Apply it immediately after planting or within 24 hours of planting to achieve the best results.

    For post-emergence, we recommend any of our products: Select, Selet Gold, Nominee Gold, and Actrox.

    5. Manage water as if your yield depends on it—because it does

    Rice is a thirsty crop, but too much water can cause just as much damage as too little. During the early stages, maintain shallow water levels (around 5 cm), increasing slightly as the plant grows.

    Drain water during the flowering period to prevent grain sterility and resume again after flowering. If you’re in an area where irrigation is necessary, schedule water cycles carefully. Good water management supports better root health, reduces weed pressure, and improves overall yield.

    Wrapping up,

    Getting started with rice farming isn’t as complicated as it may seem, but it does require planning, precision, and a willingness to learn. Start with a small plot to understand the process, and don’t cut corners when it comes to land preparation, weed control, or seed selection.

    Still not sure where to begin or what product is right for your farm? Reach out to us on any of our social media platforms—we are always ready to help. Or better yet, download the FarmPropa App and try the Product Recommender feature. It’s designed to guide you through product choices tailored to your crop, location, and specific farm needs—right from your phone.

  • Are your maize leaves turning yellow this rainy season? Here is why.

    Are your maize leaves turning yellow this rainy season? Here is why.

    For many farmers, the rainy season brings hope. The land is fertile, the crops are growing, and the harvest looks promising. But what happens when, in the middle of all this, your maize leaves begin to turn yellow? It’s frustrating and worrying.

    Yellowing leaves, also known as chlorosis, are often a sign that something is off in the field. If you’ve noticed your maize looking pale or less vibrant during what seems like perfect weather, here are a few reasons why this might be happening and what you can do about it.

    1. Loss of Nutrients Due to Excess Rainfall

    Heavy rain can wash away essential nutrients from the soil, especially nitrogen, which is responsible for the lush green colour of maize leaves. Even if you applied fertilizer at planting, the nutrients may no longer be where the plant roots can access them.

    What to look out for:
    Yellowing that starts from the lower (older) leaves and moves upward is a classic sign of nitrogen deficiency.

    What you can do:
    Apply a top-dress of nitrogen-rich fertilizer (such as urea or CAN) around three to four weeks after planting. Split applications can be more effective—small doses spaced out reduce waste and help the plant absorb nutrients more steadily.

    2. Early Pest Damage

    Insects such as stem borers and armyworms frequently attack maize plants in their early stages, particularly during warm and wet periods. These pests can damage the stem and root system, reducing the plant’s ability to absorb nutrients and water.

    What to look out for:
    Holes in the leaves, damaged whorls, or plants that appear weak, even with good rainfall. You may also see pests in the central whorl of the plant.

    What you can do:
    Use an effective insecticide early in the season. Products like Kombat, Sting, or Cypertex can help control a wide range of pests before they cause serious damage. Regular monitoring of your field will also help you catch problems early.

    3. Poor Drainage or Soil Compaction

    While rain is necessary, too much of it, especially in poorly drained or compacted soils, can lead to waterlogging. When the soil stays soggy for too long, plant roots can’t breathe or absorb nutrients, leading to yellowing leaves and stunted growth.

    What to look out for:
    Water pooling on the soil surface after rain, slow plant growth, or darkened roots when the plant is dug up.

    What you can do:
    Improve your field’s drainage by creating channels or planting on raised beds or ridges. Avoid over-tilling or using heavy machinery, as this can compact the soil and worsen drainage.

    4. Imbalanced Soil Nutrients

    Nitrogen isn’t the only nutrient maize needs. Deficiencies in magnesium, zinc, or potassium can also cause yellowing, sometimes in unique patterns like stripes or leaf-edge discolouration.

    What to look out for:
    Striped yellowing between the veins (often due to zinc deficiency) or yellowing that starts at the leaf tips or edges.

    What you can do:
    Use balanced fertilizers that include secondary and micronutrients. Foliar sprays containing zinc or magnesium can also be beneficial. For long-term results, consider doing a soil test to understand exactly what your soil needs.

    What Should You Do When You Notice Yellowing?

    The most important thing is not to panic. Yellowing is a symptom, and once you understand the cause, you can take the right action. Pay attention to when and where the yellowing starts, and combine that with what you know about your fertilizer, pest control, and drainage practices.

    Remember that every farm is different. What worked last season might need to be adjusted this year based on rainfall, soil condition, and pest pressure.

    Wrapping up,

    Acting early is key. Regular field checks, timely application of the right inputs, and good agronomic practices can help you turn the season around and protect your yield before it’s too late.

    Let’s grow better, together.

    And remember, you’re not alone. If you’re unsure about what product to use or have any questions about planting, you can always reach out to us on any of our social media platforms. We’re here to support you every step of the way.

  • Tired of Insect Problems? Find the Perfect Insecticide for Your Maize in Seconds with FarmPropa!

    Tired of Insect Problems? Find the Perfect Insecticide for Your Maize in Seconds with FarmPropa!

    Every farmer knows how quickly insects can ruin a good maize field. You work hard, plant right, and then pests come along, eating through your crops and cutting down your yield. Choosing the right insecticide to fight back can be confusing, but not anymore.

    Saro Agrosciences, your trusted farmer’s friend, has made things easier with FarmPropa, a simple, easy-to-use app that helps you find the right product for the exact problem on your farm.

    Here’s how to use the Product Recommender feature on FarmPropa to protect your maize and get the results you deserve:

    Step 1: Tell the App What You Need

    When you navigate to the product recommender part of the FarmPropa app, the first thing it asks is what kind of solution you’re looking for. Since your maize is under insect attack, simply select insecticide.

    You can also use this same app to find herbicides or fungicides for other issues, but for now, we’re focusing on insect control.

    Step 2: Select Your Crop

    Next, you’ll be asked to choose the crop of interest. FarmPropa supports many common Nigerian crops like rice, cassava, tomato, legumes, yam, oil palm, vegetables — and of course, maize.

    Once you click on maize, you’re on your way.

    Step 3: Pick Images of the Pests You See

    This is where the app gets very helpful. You don’t need to know the names of the insects damaging your farm. FarmPropa lets you select two pictures that look like the pests you’ve seen on your maize.

    Maybe it’s those tiny worms eating into your cobs, or some bugs chewing holes in your leaves, just find the images that match, and click them.

    Even if you’re not sure, the images makes it easy.

    Step 4: Get the Right Product Recommendation

    And just like that, voila!

    FarmPropa looks at all the details you’ve provided, the type of problem, the crop, and the insect, and gives you the best product to use. These aren’t random suggestions either. The app is backed by the experience and knowledge of Saro Agrosciences, which means the recommendations are reliable and effective.

    Wrapping up,

    FarmPropa takes the guesswork out of choosing insecticides. No more wasting time or money trying different products that don’t work. You now have a smart app at your fingertips, designed to support your hard work and protect your maize.

    At Saro Agrosciences, we believe farming should be rewarding, not frustrating. That’s why we created FarmPropa, because every farmer deserves good harvests, healthy crops, and peace of mind.

  • Protect Your Harvest from the Rain: 5 Common Farming Mistakes to Avoid.

    Protect Your Harvest from the Rain: 5 Common Farming Mistakes to Avoid.

    These days, the weather has a mind of its own. One moment it’s sunny, the next it’s raining heavily for days. For many farmers, this can be a real problem. Too much rain can damage crops, attract pests, and even lead to plant diseases. But sometimes, it’s not just the weather—it’s also the little things we overlook that cause bigger issues.

    In this blog, we’ll talk about five common mistakes farmers make when trying to protect their farms during rainy weather and share simple tips to help you avoid them and keep your crops safe.

    1. Wrong timing for applications

    Weather forecasts can be a farmer’s best friend, but relying solely on them can lead to errors. With fluctuating conditions, such as unexpected rain showers, it’s essential to pay close attention to local forecasts. Applying crop protection products just before a rainstorm can wash them away, rendering them ineffective. Aim to apply treatments when conditions are optimal—consider timing your applications based on not just current weather but also the forecast for the next few days.

    2. Overlooking the condition and needs of your soil

    One of the most significant mistakes farmers make is overlooking soil conditions before applying treatments. Heavy rains can lead to waterlogged soils, which may impede the effectiveness of fertilisers, herbicides, and fungicides. Before any application, conduct a soil assessment to determine its moisture level and compaction. Avoid applying treatments on saturated soils, as this can lead to runoff and reduced efficacy. Instead, wait for the soil to dry adequately before proceeding.

    3. Neglecting drainage

    Poor drainage can lead to waterlogged fields, which are breeding grounds for diseases like root rot and fungal infections. Farmers often underestimate the impact of drainage on crop health. Installing effective drainage systems and maintaining ditches and channels can help manage excess water during periods of heavy rain. Regularly inspect your drainage systems to ensure they are functioning correctly and are free from obstructions.

    4. Ignoring pest attacks

    Heavy rainfall can create an ideal environment for pests to thrive, yet many farmers ignore regular pest monitoring. Conditions following significant rain events can lead to population explosions of pests that target crops. Implementing an integrated pest management (IPM) strategy allows farmers to monitor pest levels and take timely action when populations exceed threshold levels. Regular scouting of fields helps identify pest issues early, allowing for more effective interventions.

    5. Investing in effective crop protection solutions

    The quality of crop protection products plays a crucial role in their effectiveness, especially during challenging weather conditions. Cheaper, low-quality options may struggle to perform in wet environments, leading to ineffective disease control and pest management. We recommend investing in crop protection solutions from Saro Agrosciences, which are specifically formulated to meet the demands of the conditions you’re likely to face.

    Need assistance in selecting the right crop protection product for your farm? Visit here to browse through our extensive catalog. Alternatively, the FarmPropa app simplifies the process for you. Just download the app, register, and access the product recommendation tab to discover the best solutions for your crops. It’s that easy!

    As the climate continues to shift and weather patterns become more unpredictable, effective farm protection becomes increasingly vital. Avoiding these common mistakes—such as ignoring soil conditions, timing applications incorrectly, neglecting crop rotation, overlooking drainage, failing to monitor pests, skipping preventive treatments, and not investing in quality products—you can safeguard your crops against the challenges posed by heavy rainfall and other weather-related issues. With careful planning and proactive strategies, you can ensure a bountiful harvest, even in the face of unpredictable weather.